
Windows Live Mail 2011 Set up
Estimated Reading Time: 3 MinutesWindows Live Mail 2011 core features:
-
Easy to organize multiple email accounts and emails.
-
Group conversations from the same subject.
-
Send tons of high-quality pictures easily and fast, because of the integration with SkyDrive.
-
Search is built-in right in your inbox, which makes it easier to find messages.
-
Add events to the calendar right from your inbox.
-
Add and manage contacts.
-
RSS feeds capabilities.
-
Centralize all your emails into one inbox timeline with Quick View.
How to install Windows Live Mail 2011
1. Go to Windows Live Mail 2011 page, click Download now, and Run.
2. Windows Live Essentials 2011 installation starts and click on Choose the programs you want to install.
3. Select Mail among all products and click Install. Click Close once the installation is done.
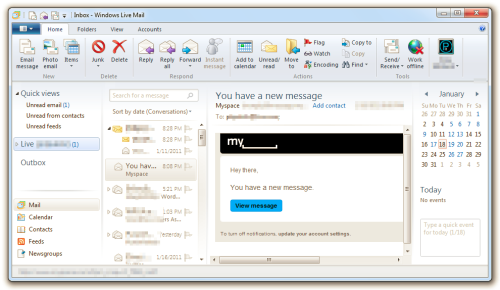
4. Next, start Windows Live Mail.
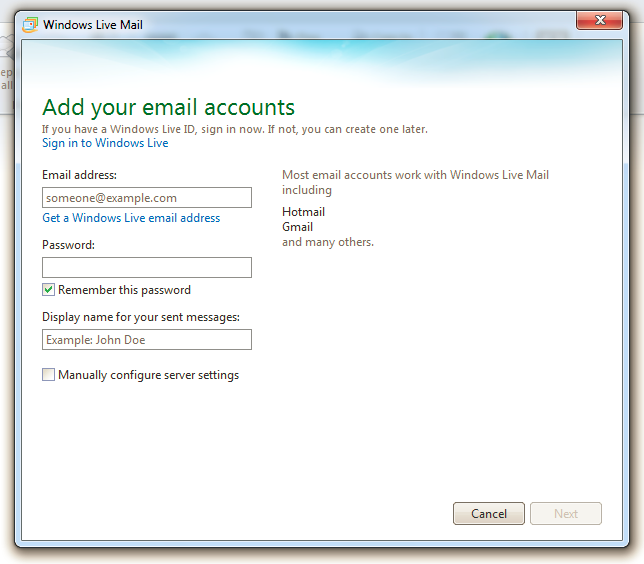
The first time you run the program it is going to ask you to enter your email account information, after adding it, choose whether or not to remember your password, and click Next. If you don’t have an email account you can just click Get a Windows Live email address link to create one.
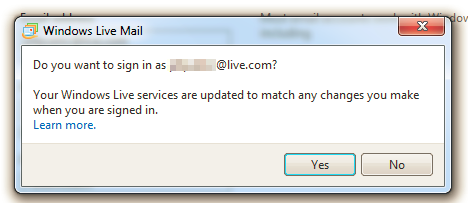
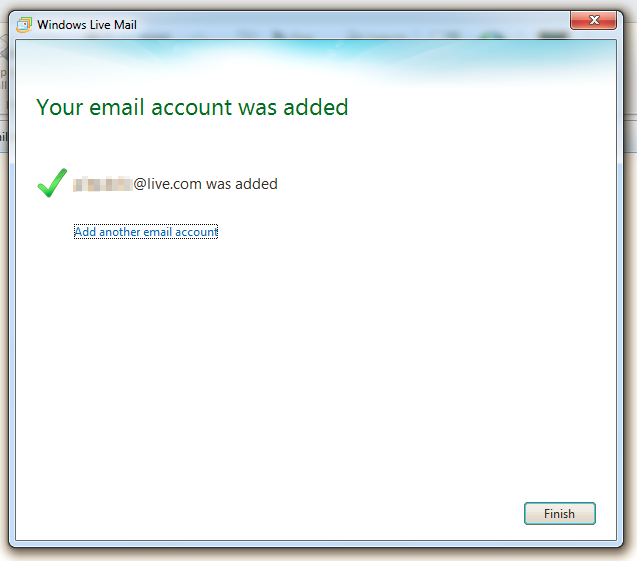
5. In the next question just click Yes and then Finish.
Note: If you need to add multiple email accounts click on Add another email account instead of Finish to repeat the process.
Configuring Windows Live Mail 2011 options:
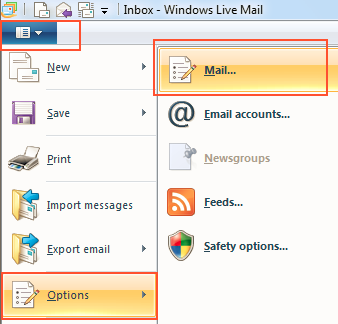
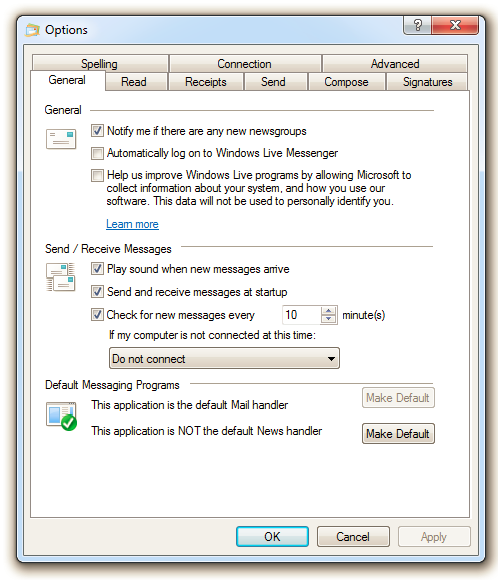
To change the settings to your preference, go to menu > Options, and click on Mail.
-
Customization for Send/Receive Messages.
-
Make Windows Live Mail 2011 your default email program.
-
Read, Receipts, Send, Compose, Signatures, Connection, and Advanced options.
-
Spelling settings, custom dictionary, and configure languages
-
And many other settings
Setting up your Windows Live Mail 2011
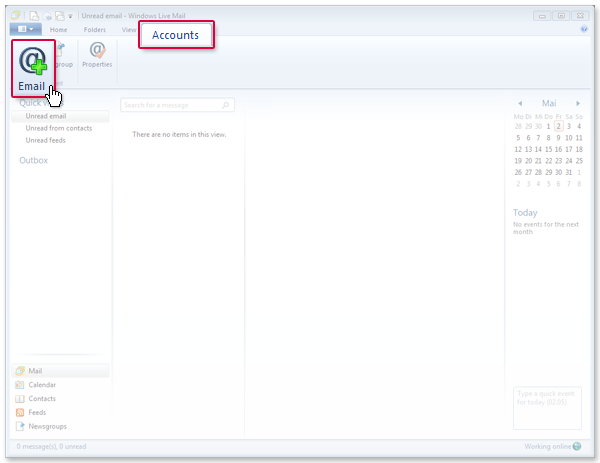
1. Select Accounts and then Email
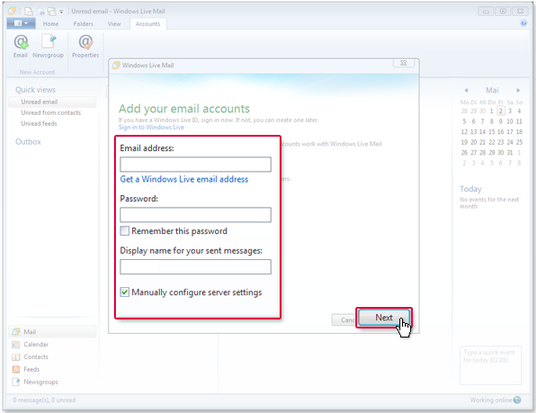
2. Enter your SpinTel email address and password. Tick the box Manually configure server settings and click on Next.
3. For Incoming email server type, choose:
- IMAP (Recommended), or
- POP
Tip: We recommend using IMAP, especially if you access your email from multiple devices (such as a phone, tablet, or computer). IMAP keeps your emails synchronised across all your devices.
Enter the corresponding settings of the incoming email server type of your choice below.
| Setting | IMAP | POP |
| Incoming Mail Server | imap.spintel.net.au | pop3.spintel.net.au |
| Incoming Port | 993 (SSL/TLS) Alternative: 143 (STARTTLS/TLS if supported) |
995 (SSL/TLS) Alternative: 110 (Unencrypted - Not Recommended) |
| Outgoing Mail Server (SMTP) | smtp.spintel.net.au | smtp.spintel.net.au |
| Outgoing Port | 587 (STARTTLS/TLS) Alternative: 465 (SSL/TLS) |
587 (STARTTLS/TLS) Alternative: 465 (SSL/TLS) |
| Outgoing Server Authentication | Enabled | Enabled |
| Username | Your SpinTel email username (the part before @spin.net.au) | Your SpinTel email username (the part before @spin.net.au) |
| Password | Your SpinTel email password | Your SpinTel email password |
If you're changing an existing email account from POP to IMAP or from IMAP to POP, we recommend backing up any important emails before making the change. This helps prevent accidental data loss, as some email applications store emails differently depending on the account type.
4. Complete the Setup
- Review your settings.
- Click Next, then Finish.
- Windows Live Mail will connect to the SpinTel mail servers and begin synchronising your mailbox.
If any issue arises, please contact SpinTel Support for further assistance.