TP-Link HX510 Set Up Guide - Wirelessly
Estimated Reading Time: 3 MinutesThe Whole Home Mesh Wi-Fi AP system is designed to extend your network coverage across your entire home. It consists of a Main AP that connects to a wired router, modem, or gateway, and one or more agents that extend the wireless coverage.
Empowered by EasyMesh technology, HX510 provides a strong WiFi signal in every corner of your home. Wireless connections and optional Ethernet backhaul work together to link each unit, providing even faster network speeds and truly seamless coverage with one WiFi name.
Click to expand each section and discover detailed information on the HX510, including setup guides, features, and troubleshooting tips to help you maximise your device’s potential.
Appearance
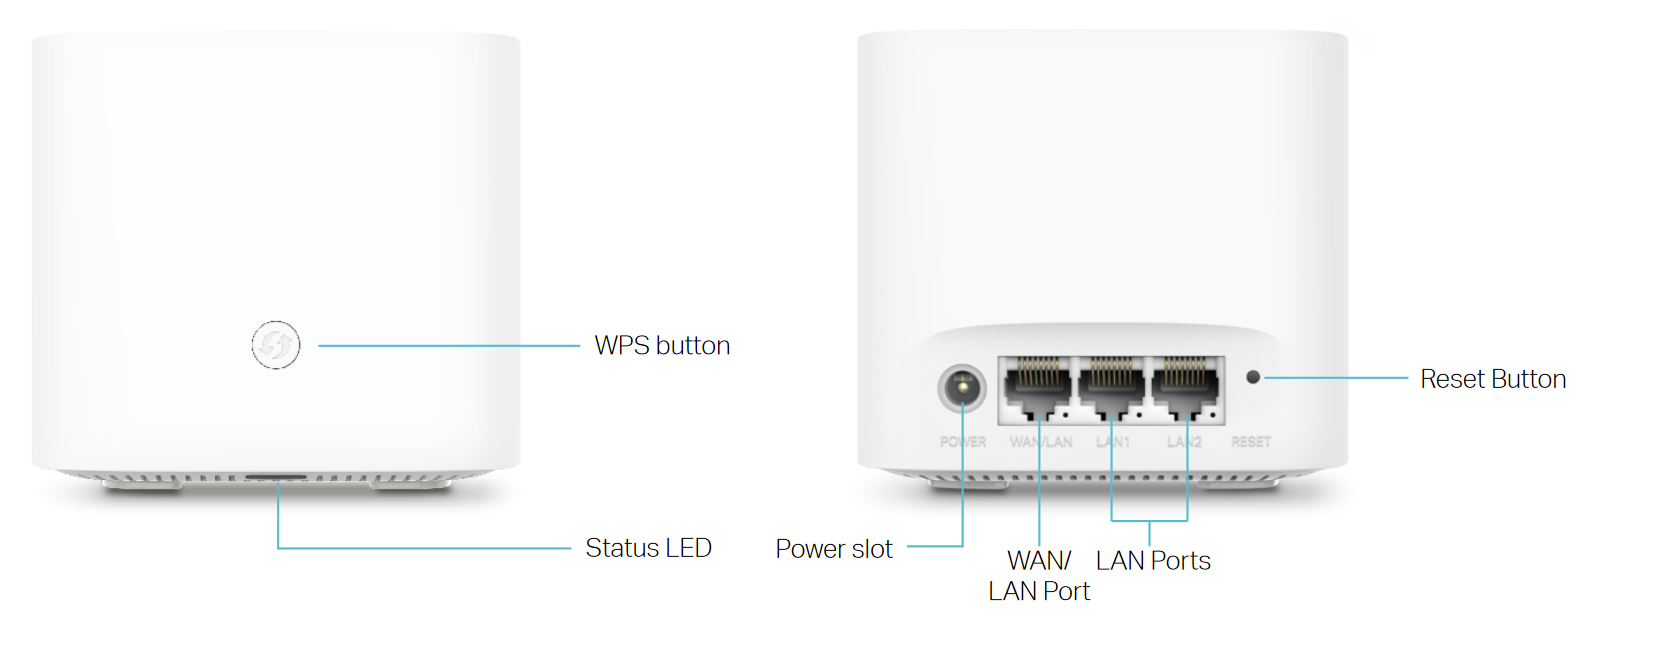
The device features an LED that varies in behavior based on its operational status and is equipped with a WPS button, three RJ-45 Ethernet ports, a power port, and a RESET button.
Understanding the LED Status
|
Status |
Indication |
|
Yellow |
The connection quality of the device is normal. |
|
Flashing yellow |
The device is starting up or resetting. |
|
Flashing blue |
The device is ready for configuration. |
|
Fast flashing blue |
The device is trying to establish a WPS or mesh connection. This process may take up to two minutes. |
|
Blue |
The device has been set up as a controller, or its wireless/wired connection with the controller is good, but the internet is unavailable. |
|
Flashing white |
The device is upgrading the firmware. |
|
White/green |
The device is ready and the internet is available. |
|
Flashing red |
The device has lost connection with the controller. (For agent only). |
|
Red |
The device has an issue. |
|
Off |
Power is off, or the status LED is turned off. |
Setting Up TP-Link HX510 AX3000 Whole Home Mesh Wi-Fi
HX510 is designed to work alongside your VX230v Modem or any EasyMesh-compatible modem, allowing it to act as an additional Mesh device.
For a visual guide on setting up the HX510, watch the video below. You can also follow the step-by-step instructions provided further down.
Step-by-step guide on how to set up HX510 Mesh Unit Wirelessly
1. Access your TP-Link VX230 modem by typing in http://tplinkmodem.net/ or http://192.168.1.1/ on a web browser and log in with the password you set for the modem.
The default password is admin1.

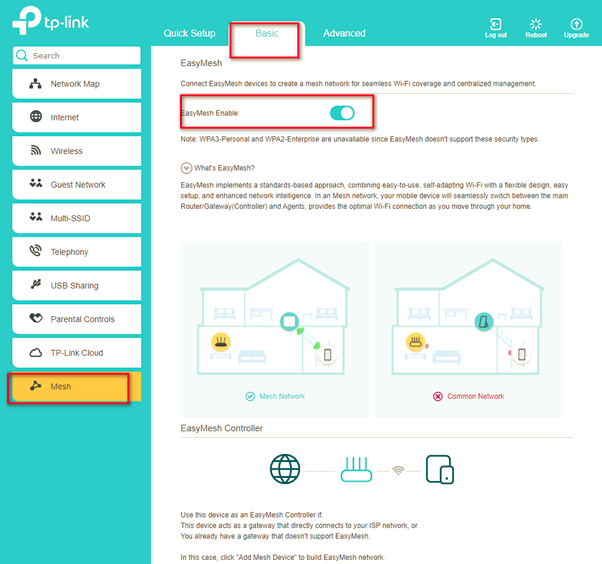
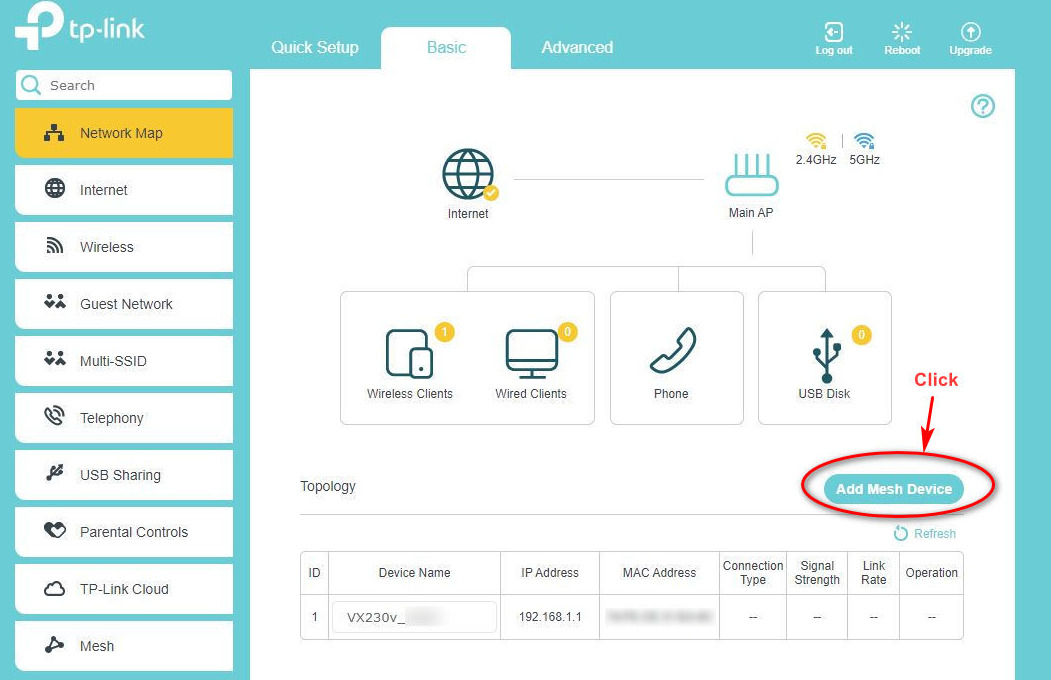
3. Next, go to Network Map and click on Add Mesh Device
4. Select Add By Scanning
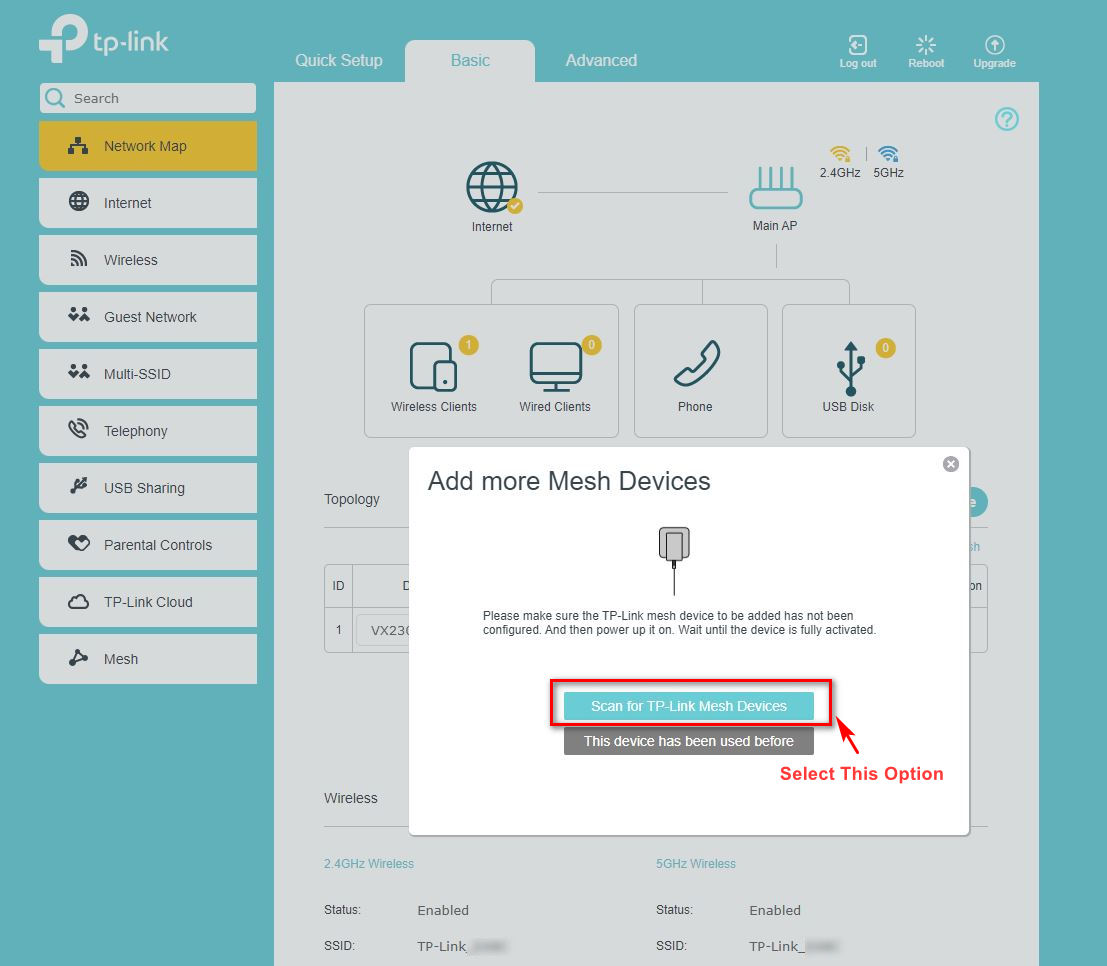
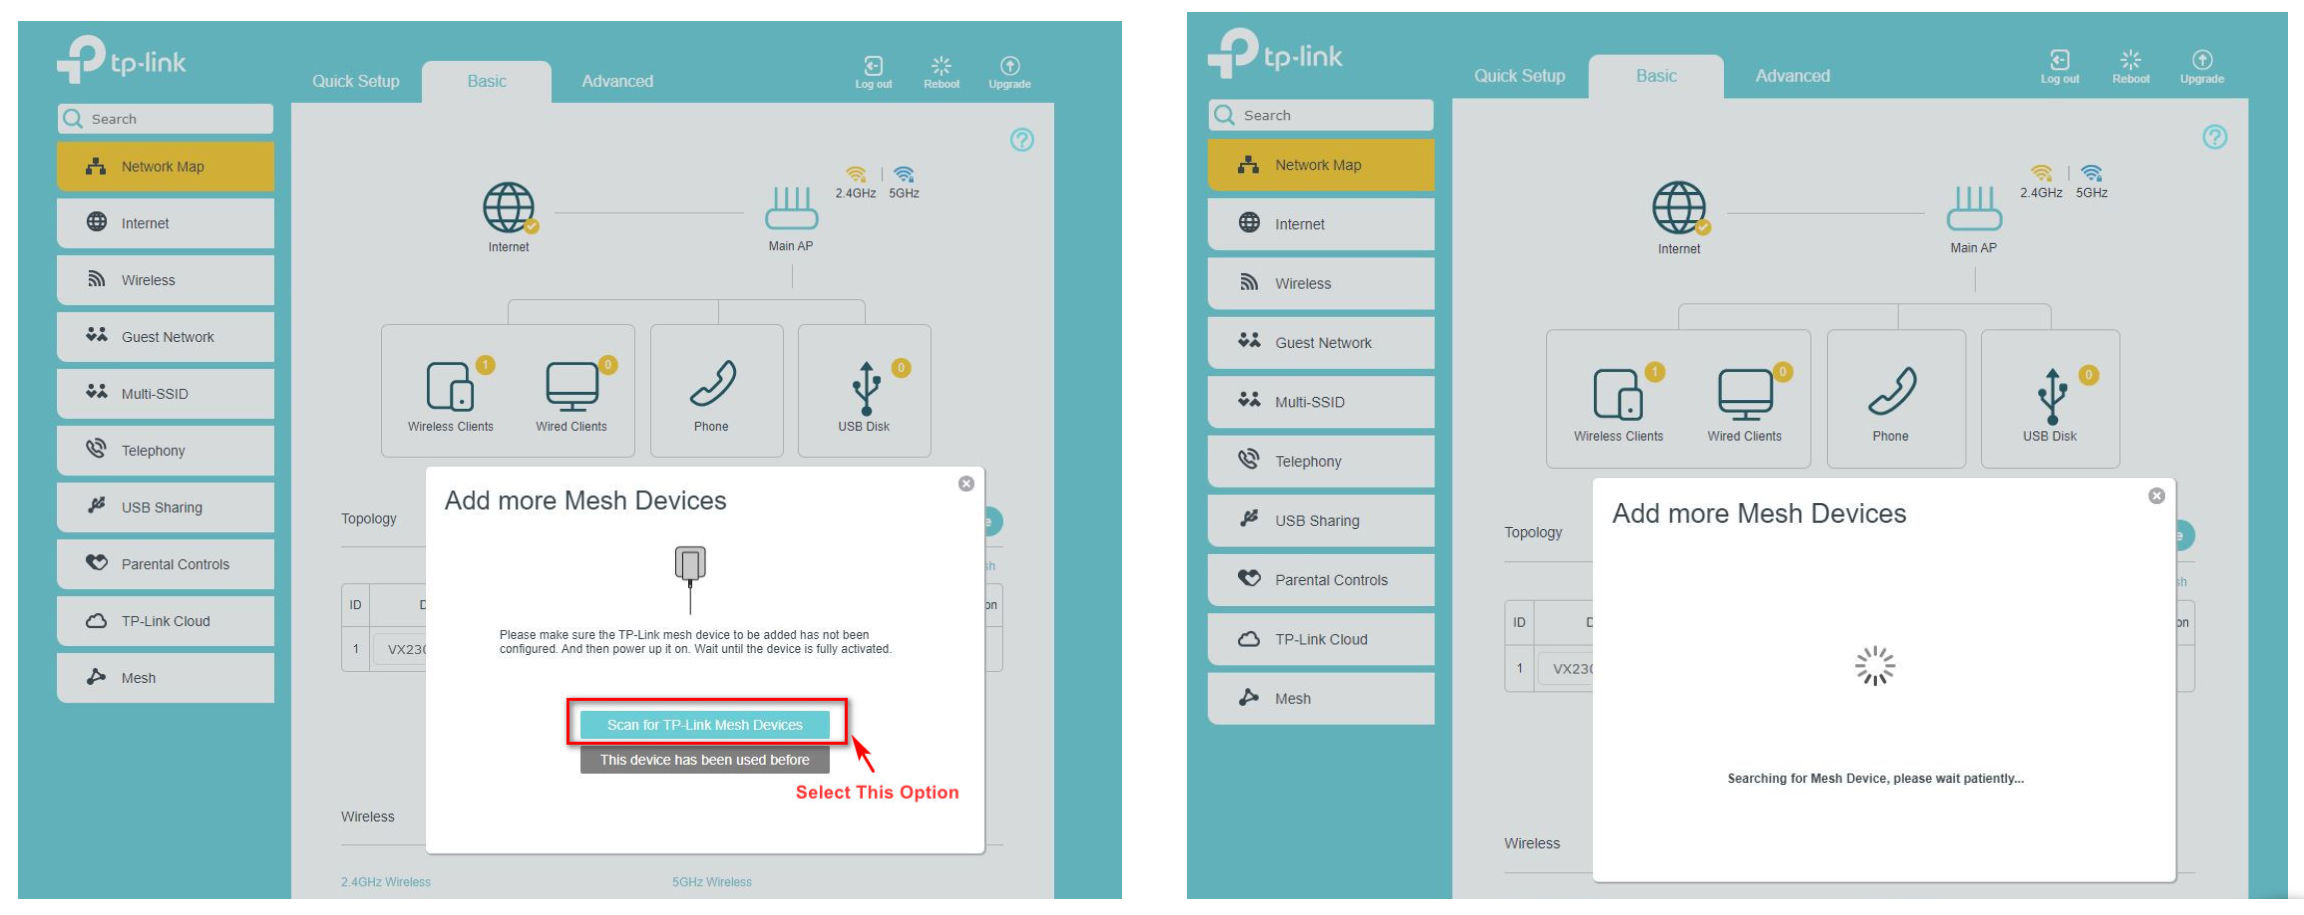
5. Click Scan for TP-Link Mesh Devices
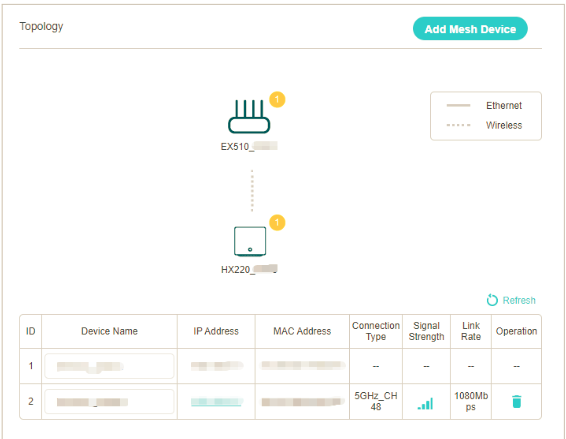
6. The detected mesh will appear as shown below.
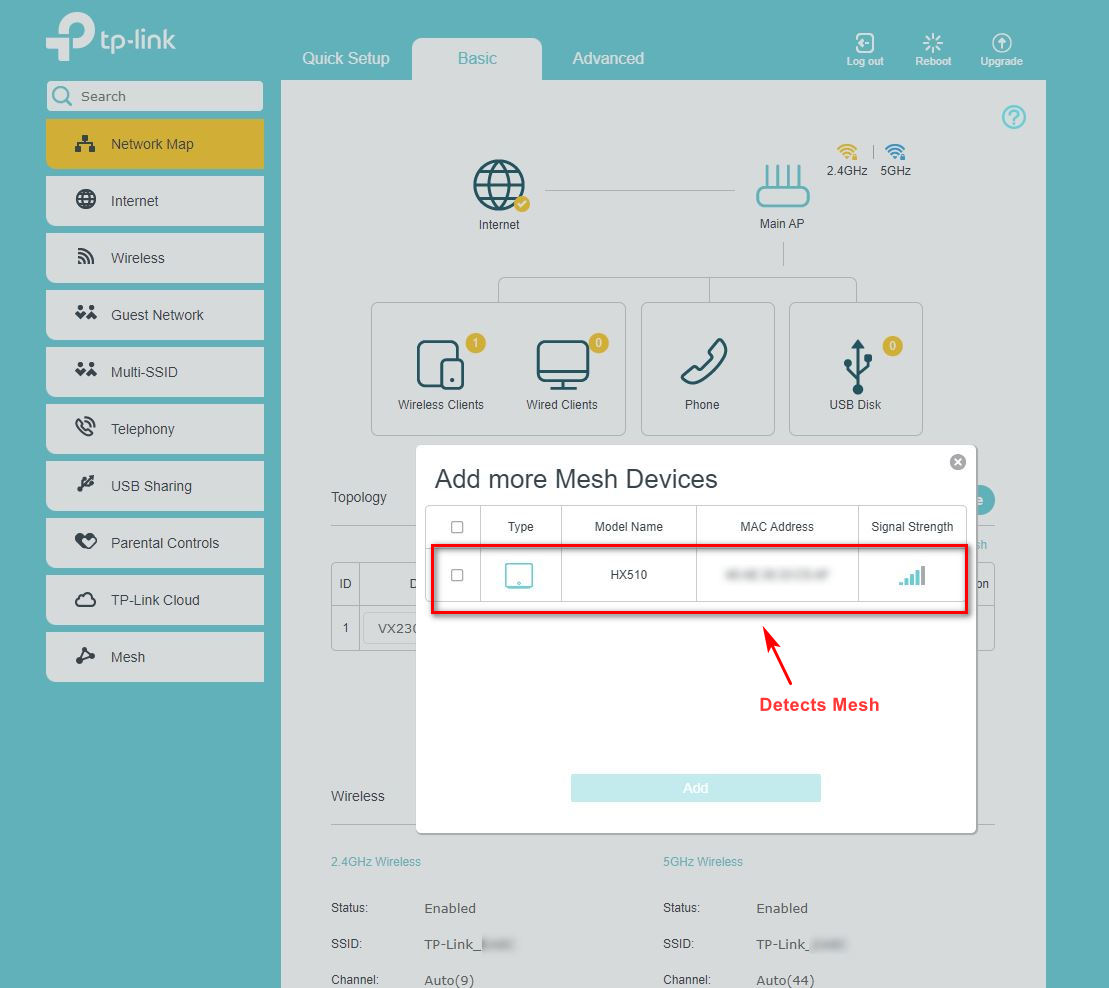
7. Tick the box to add the Mesh then click the Add button.
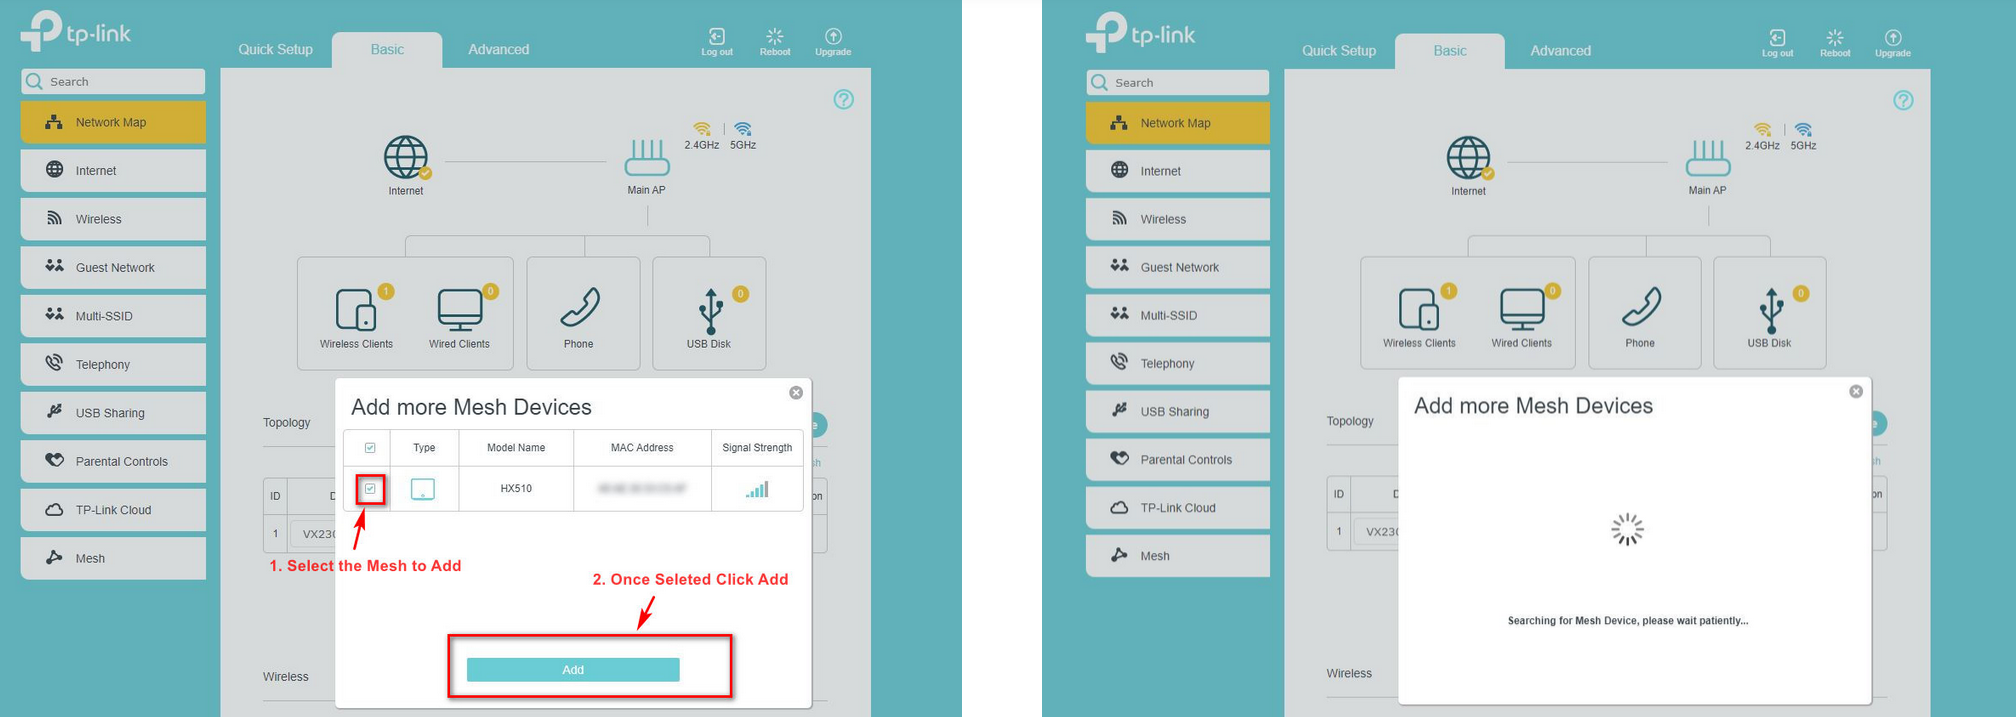
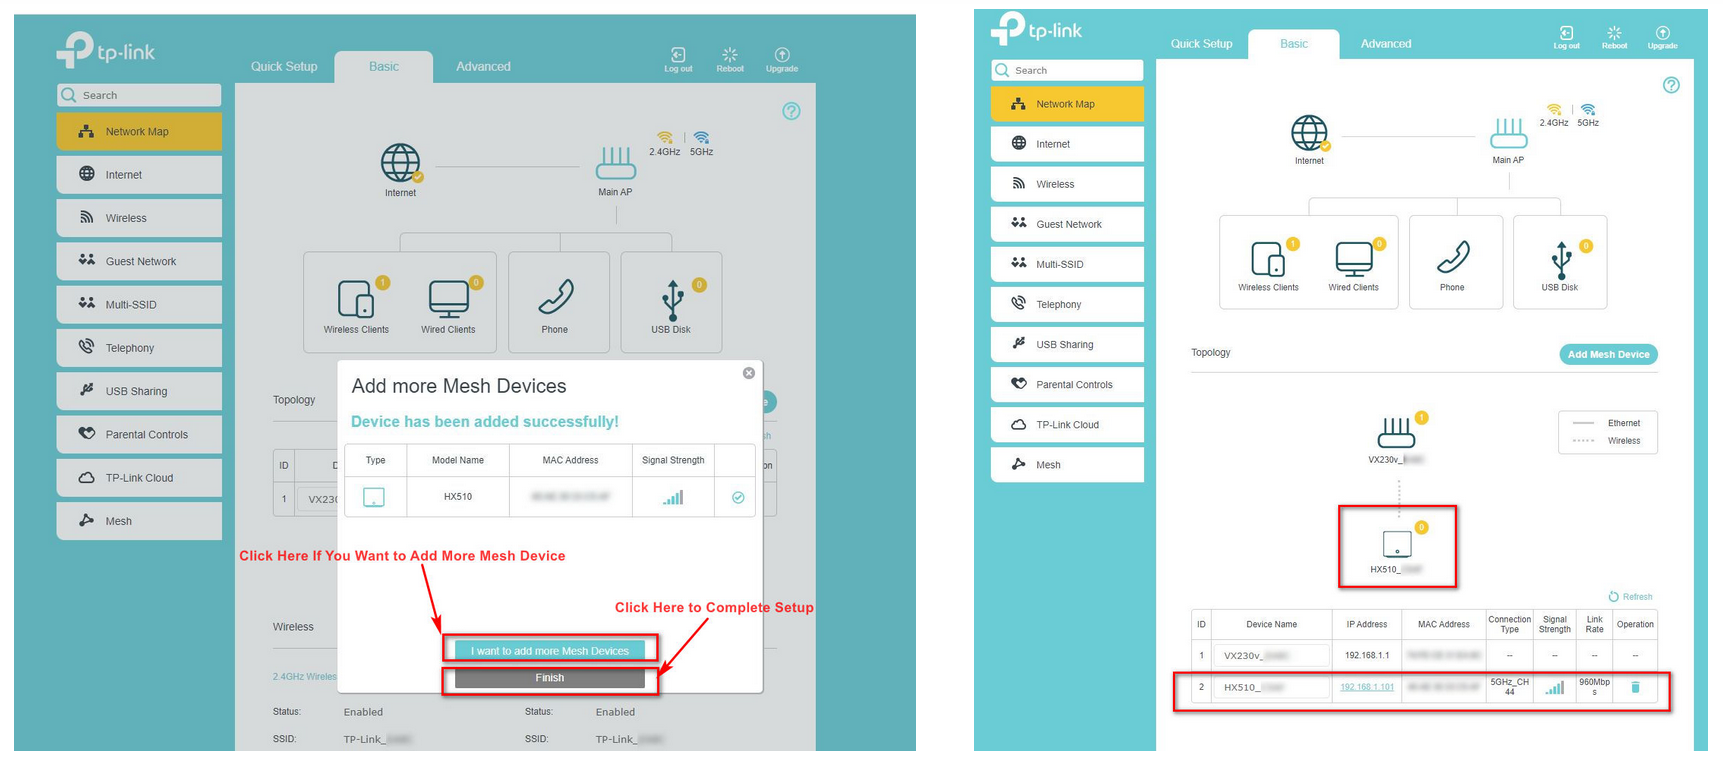
8. Click Finish. Set up complete! You will see the added device as shown below.
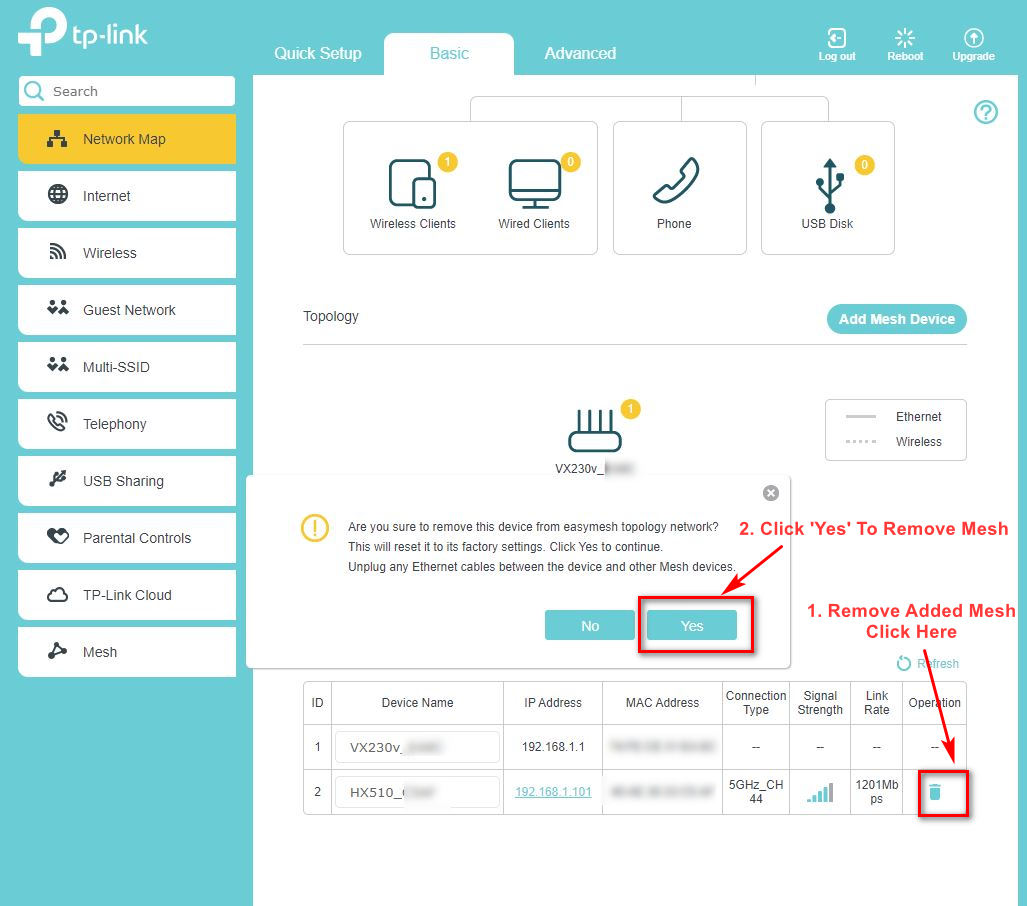
How to Remove the Mesh Device from your TP-Link VX230 Modem
1. Click on the trash icon as shown below.
2. Select Yes to completely remove the added Mesh device.
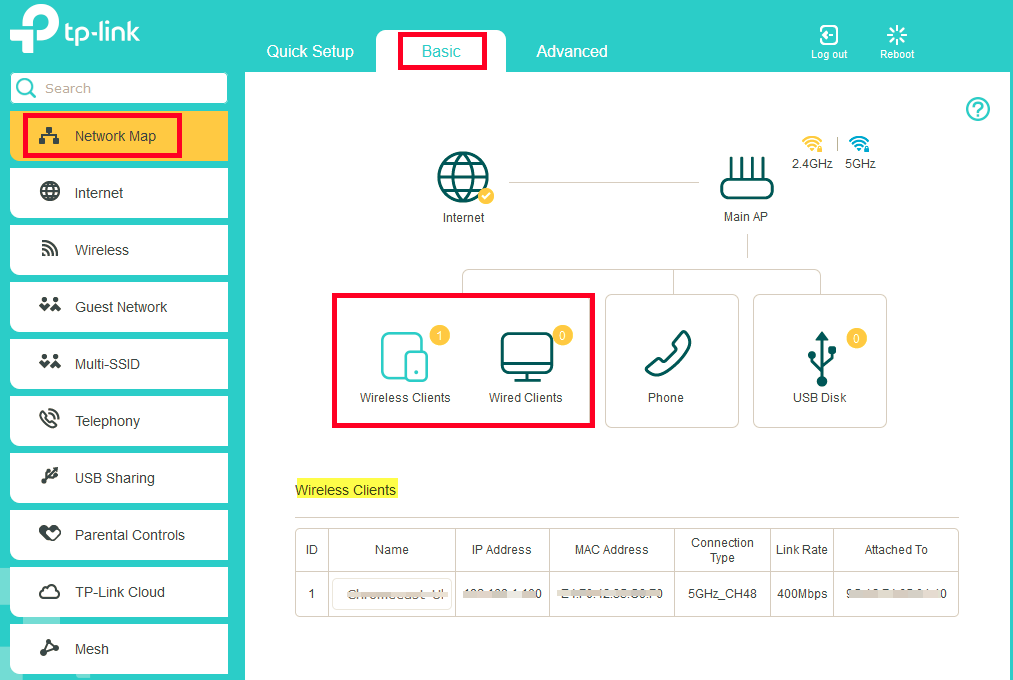
To view the mesh devices and connected clients in the network:
1. Go to Basic > Network Map.
2. Click the "Main AP" icon to view all mesh devices.
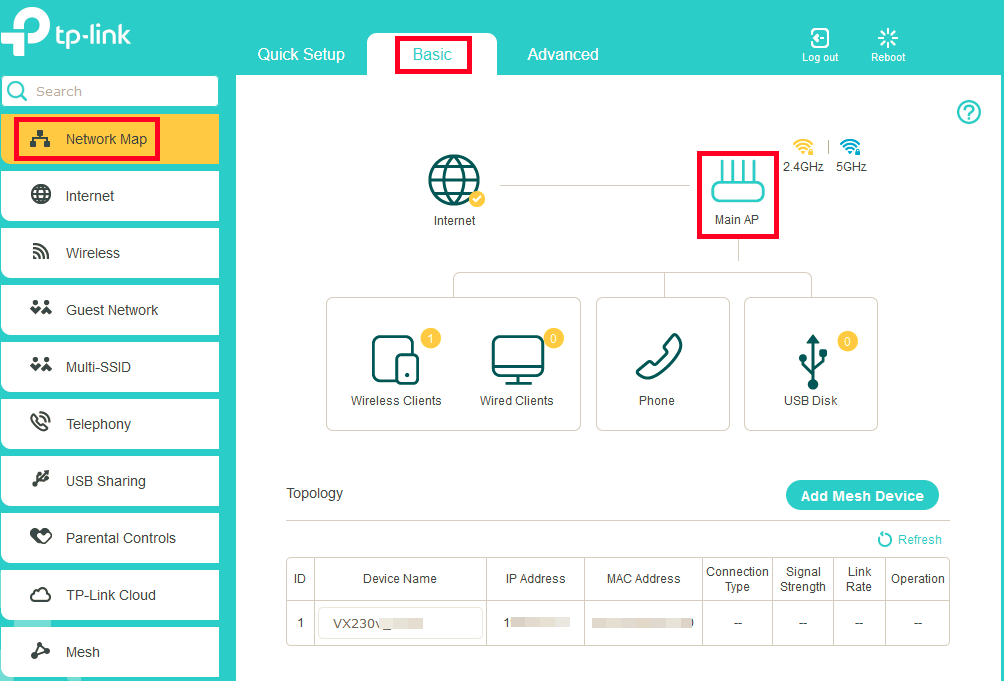
3. Click the "Wired and Wireless Clients" icon to view all connected clients.
To manage an EasyMesh device in the network:
Click the Mesh device’s IP Address to redirect to the web management page of this device and view detailed information.