
How to Enable Port Forwarding Using a TP-Link Modem
Estimated Reading Time: 3 MinutesIntroduction
Port forwarding allows external devices to access services on your home network, such as gaming servers, security cameras, or remote desktop connections. To configure port forwarding on a TP-Link modem, you’ll need some specific information. This guide will show you where to find that information and how to enable port forwarding on your modem.
Step 1: Gather the Required Information
Before setting up port forwarding, you'll need to know the following details:
- Service Port: This is the port number your service or application needs to operate. Common ports include:
- HTTP (Web Server): Port 80
- FTP (File Transfer): Port 21
- Remote Desktop: Port 3389
You can typically find this information in the documentation of the service or application you're trying to use.
- Internal IP Address: The internal IP address is the local IP of the device (e.g., computer, gaming console, or security camera) you want to forward traffic to. To find this:
- On Windows: Open the Command Prompt and type ipconfig. Look for the "IPv4 Address" under your network connection.
- On macOS: Open System Preferences > Network, select your active connection, and view the "IP Address."
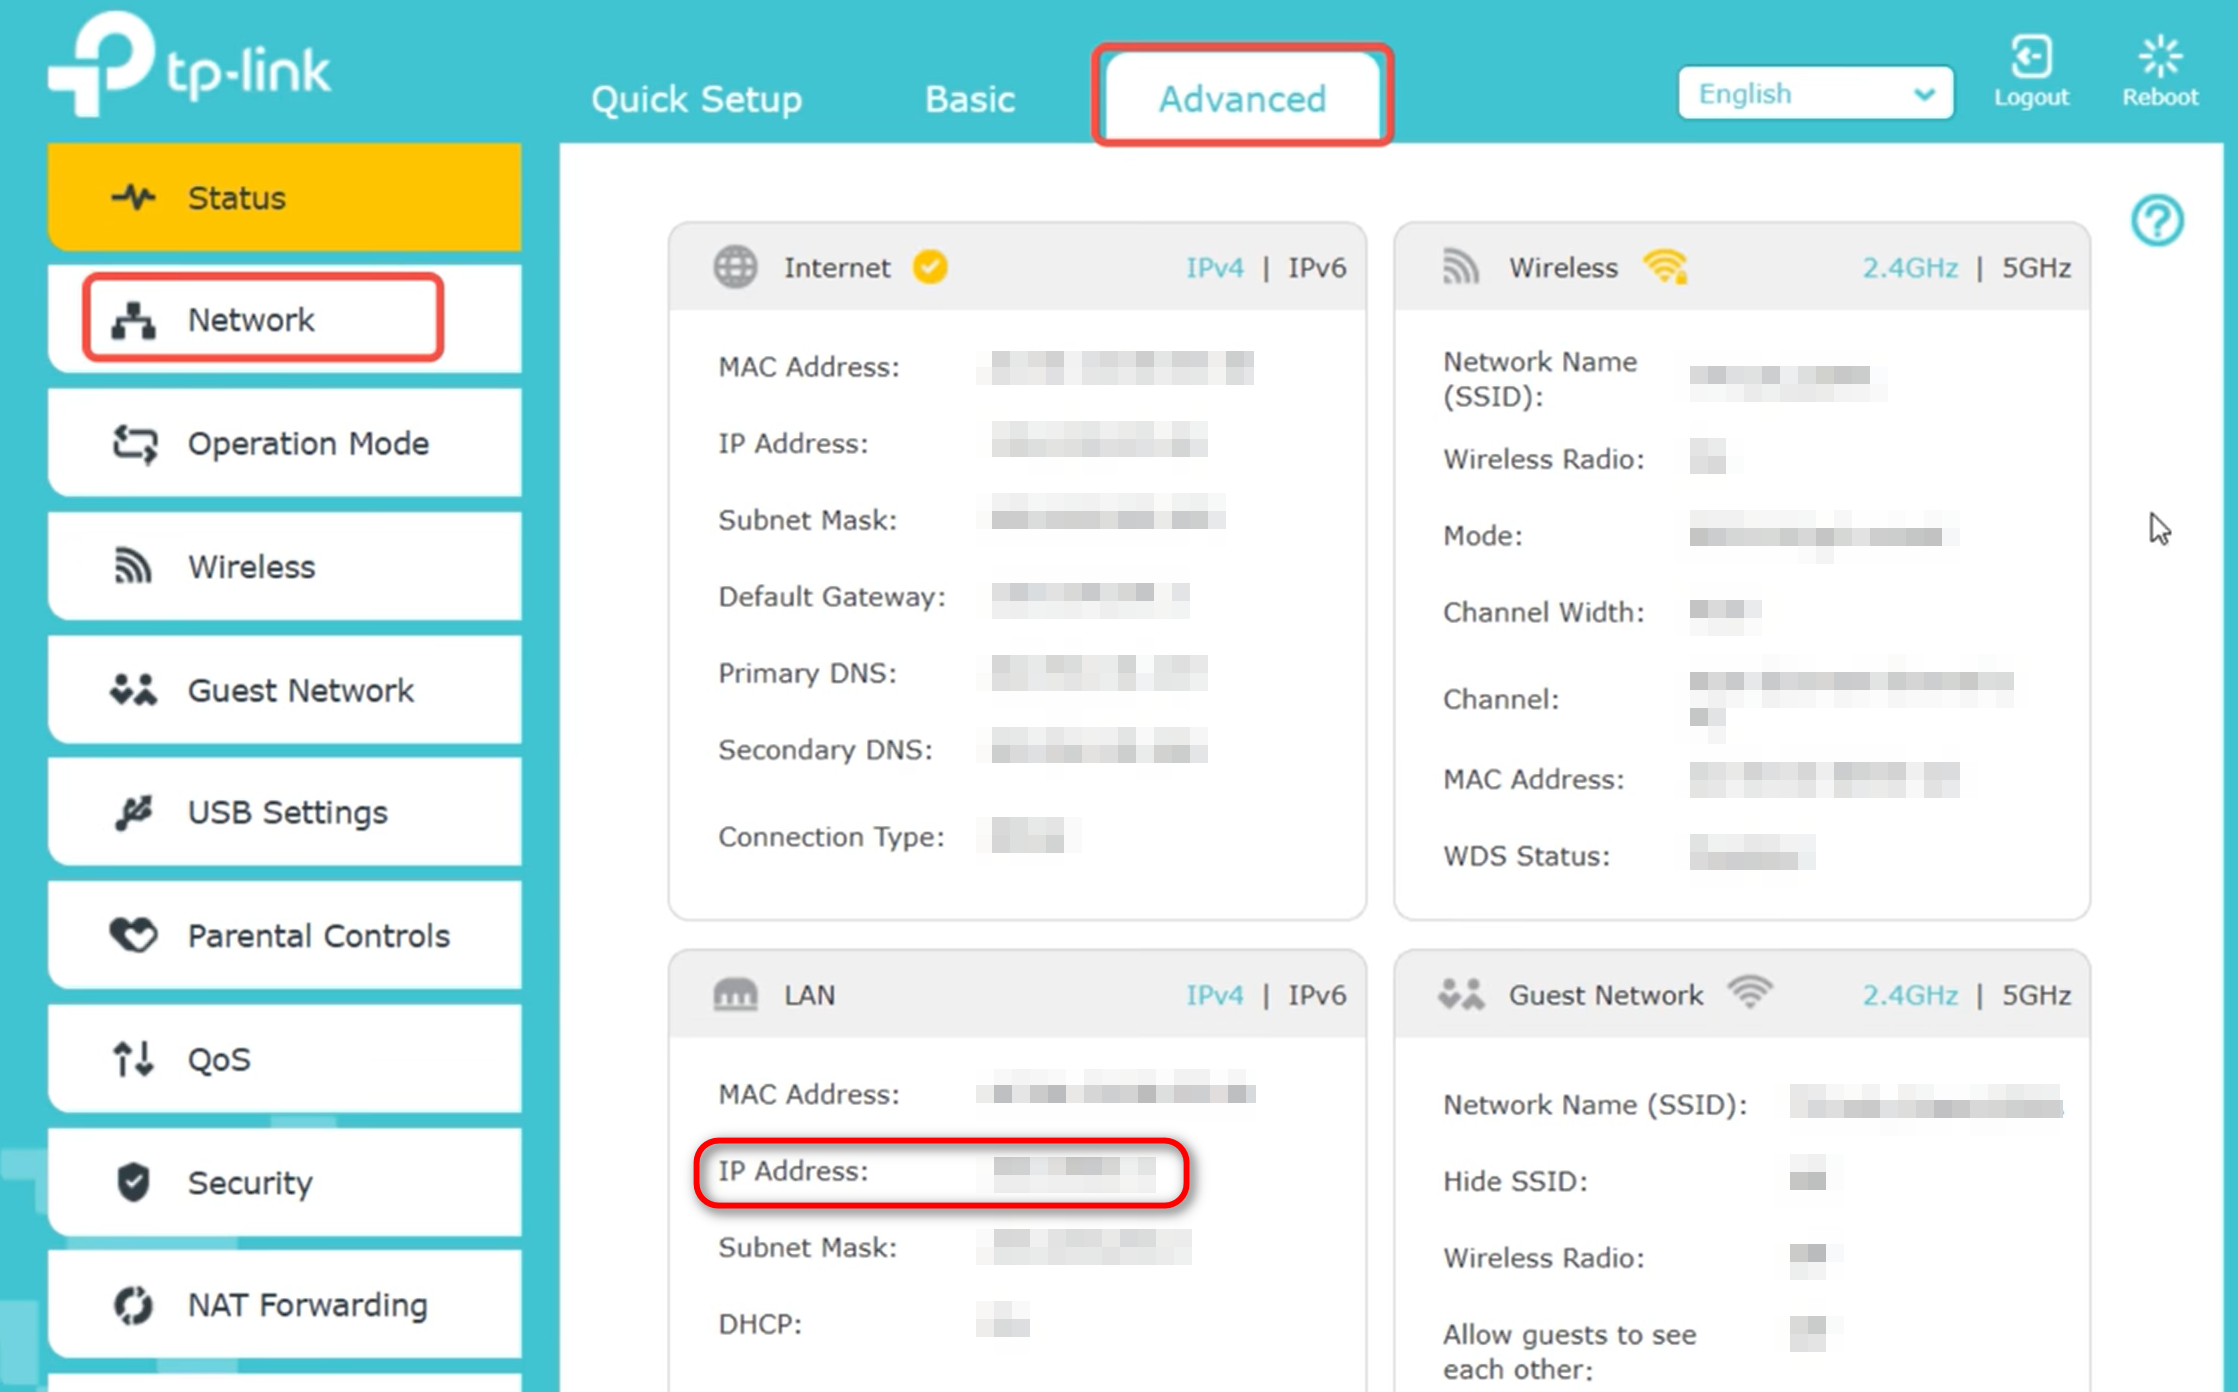
- On the TP-Link Modem: Navigate to Advanced > Network > LAN > DHCP Client List to find the IP addresses of devices connected to your network.
Step 2: Access the TP-Link Web Interface
- Connect to the TP-Link Modem: Ensure your computer or device is connected to the modem, either via Wi-Fi or Ethernet.
- Open a Web Browser: On your connected device, open a browser like Chrome, Firefox, or Safari.
- Enter the TP-Link IP Address: In the browser's address bar, type the TP-Link modem’s default gateway IP address: 192.168.0.1 or 192.168.1.1 and press Enter.
- Log In to the Modem Interface: You'll be prompted to log in. The default username and password are usually admin for both fields, please see the modem sticker. If you’ve changed them and don’t remember, reset the modem to factory settings.

Step 3: Find the Port Forwarding Section
- Navigate to the Forwarding Section: Once logged in, look for Forwarding or NAT Forwarding in the menu, depending on your TP-Link model.
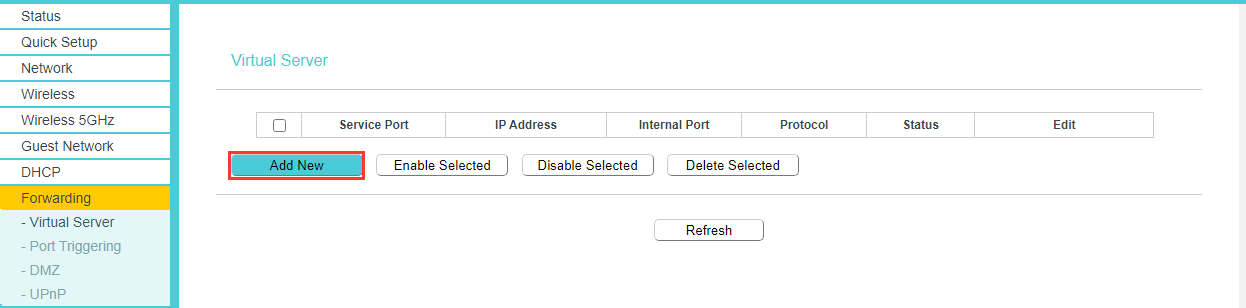
- Click on Virtual Server: Under Forwarding, select Virtual Server. This is where you will configure the port forwarding rules.

Step 4: Add a Port Forwarding Rule
- Add a New Entry: Click Add New to create a new port forwarding rule.
- Enter the Required Information:
- Service Port: Enter the external port number (e.g., 80 for HTTP, 3389 for Remote Desktop).
- Internal IP Address: Enter the local IP address of the device that will receive the forwarded traffic (e.g., your computer, game console).
- Internal Port: This is usually the same as the service port. For example, if you’re forwarding port 80, the internal port will also be 80.
- Protocol: Choose between TCP, UDP, or All depending on the requirements of your service or application. TCP is often used for most services.
- Status: Set this to Enabled to activate the rule.

- Save the Settings: After filling in the required details, click Save.
Step 5: Test the Port Forwarding
Verify the Port is Open: To ensure the port forwarding rule works, use an online tool like canyouseeme.org or test the connection with the service or device you’re forwarding the port to. Ensure the service is running on the target device.
Additional Tips
- Assign a Static IP Address: It’s best to assign a static IP address to the device you’re forwarding to. This ensures the internal IP doesn’t change after a modem reboot.
- Security Considerations: Only open the ports you need, as exposing too many ports can be a security risk. Always disable or remove unused port forwarding rules.
- Check Firewall Settings: If the port forwarding doesn’t seem to work, make sure your modem's firewall isn’t blocking the port.