Configuring D-Link Modem for SpinTel NBN
Estimated Reading Time: 4 MinutesHow do you know if your D-Link modem is compatible with nbn?
There are 2 different types of ports you need to check whether your modem is compatible with the type of nbn service that you have on your premise.
1. DSL port - often grey in colour, uses RJ11 cable. This is the same as the old telephone cable you would use to plug your home phone into the wall socket.
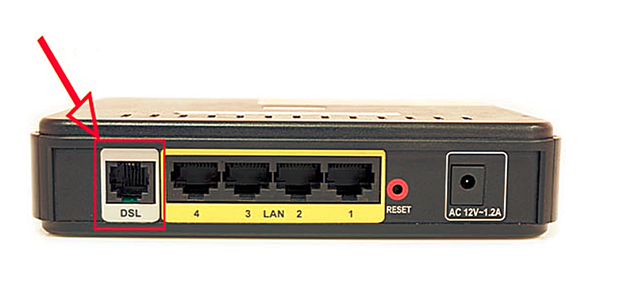
2. WAN port - Also known as the internet port that uses RJ-45 Ethernet cable to connect your D-link modem to the nbn connection device.

Some modems have both of these ports, and some only have one. To identify which port is required for your nbn type of service, check the table below.
|
NBN type |
Modem connection type |
Authentication |
Port Required |
|
Fibre to the Premise |
Router/WAN connection |
IPOE/Dynamic/DHCP/Automatic IP |
WAN |
|
Fixed Wireless |
Router/WAN connection |
IPOE/Dynamic/DHCP/Automatic IP |
WAN |
|
Hybrid Fibre Coaxial |
Router/WAN connection |
IPOE/Dynamic/DHCP/Automatic IP |
WAN |
|
Fibre to the Curb |
Router/WAN connection |
IPOE/Dynamic/DHCP/Automatic IP |
WAN |
|
Fibre to the Node |
VDSL Modem required |
IPOE/Dynamic/DHCP/Automatic IP |
DSL |
|
Fibre to the Basement |
VDSL Modem required |
IPOE/Dynamic/DHCP/Automatic IP |
DSL |
How Do You Set up Your D-Link Modem?
- If there is no NBN Connection Box installed, connect the DSL port on the back of your D-Link modem to your phone wall socket using a phone cable.
- If there is an NBN Connection Box installed, connect to the WAN/Internet port on the back of your modem to your NBN Connection Box.
- Connect any of the LAN ports on the back of your modem to your PC (optional)
- Plug the NBN connection box, if there’s any, to the power socket
- Connect the power port on the back of your modem to your power socket.
- Ensure the modem is not locked to a specific provider. If it is, contact your provider to unlock it or use an unlocked modem.
- Perform a factory reset on the modem if needed. Reconnect your devices using the default login credentials, which are typically found on the modem label.
- Open a web browser and enter the modem’s default IP address to configure the modem for IPoE set-up.
How Do You Log Into Your D-Link Modem?
Different D-Link GUIs
- New Interface
To access the modem interface, please make sure your device is connected to your D-Link modem through a wired or wireless connection.
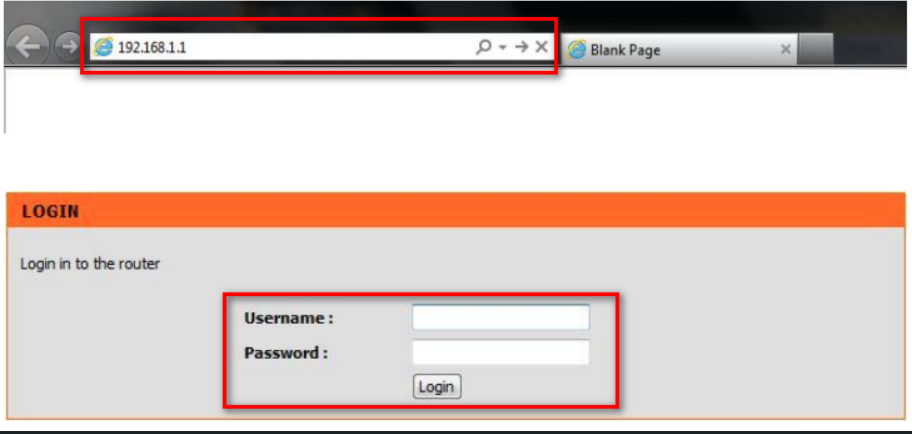
- Open a web browser and enter http://192.168.1.1 in the address bar.
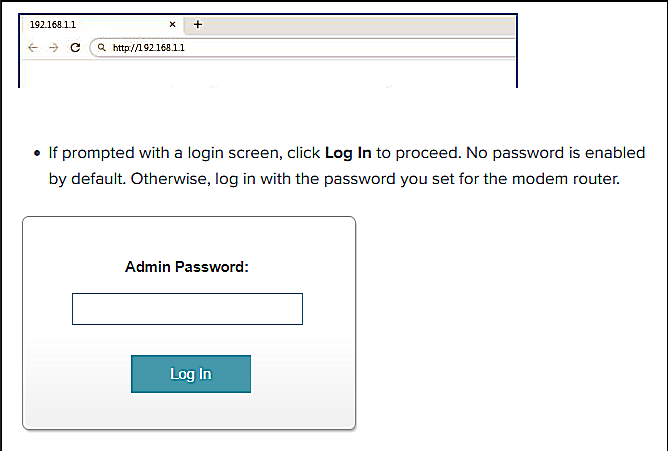
If the IP address does not work, please check the label attached to the back of the modem/router. Else, check your router’s IP address. For instructions, click here.
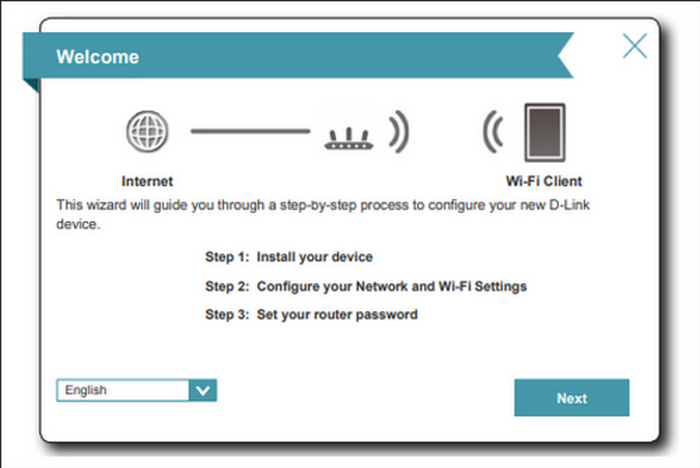
- Once logged in, the Setup Wizard shows up, click Next to continue
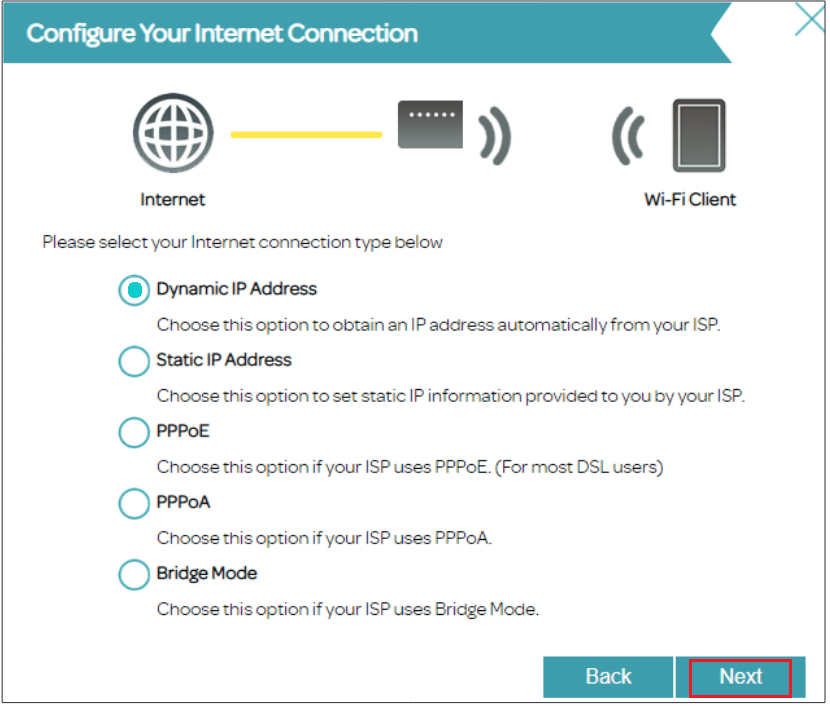
- If the router does not detect a valid Internet connection, a list of connection types to choose from will be displayed. Choose Dynamic IP Address.
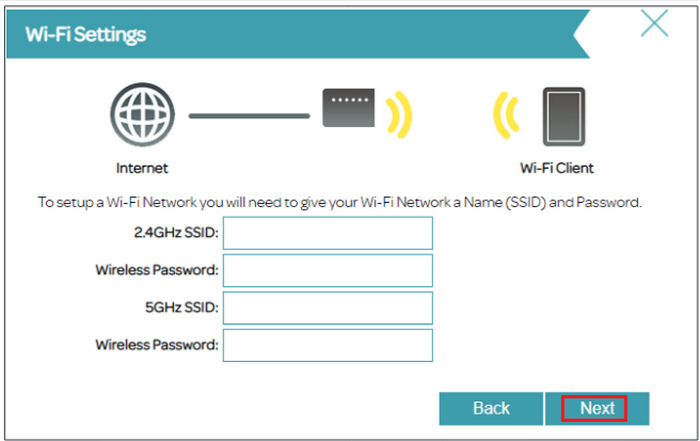
- Personalise your WiFi credentials and click on Next.
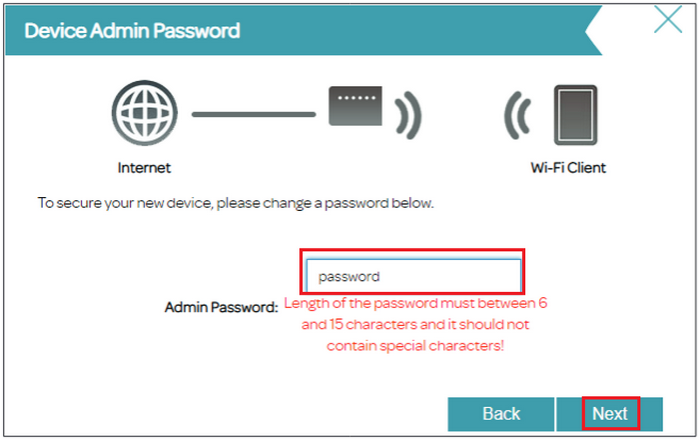
- In order to help protect your router from unauthorised users, please enter a new password. You will be prompted for this password every time you want to use the router’s web configuration utility. Click Next to continue.
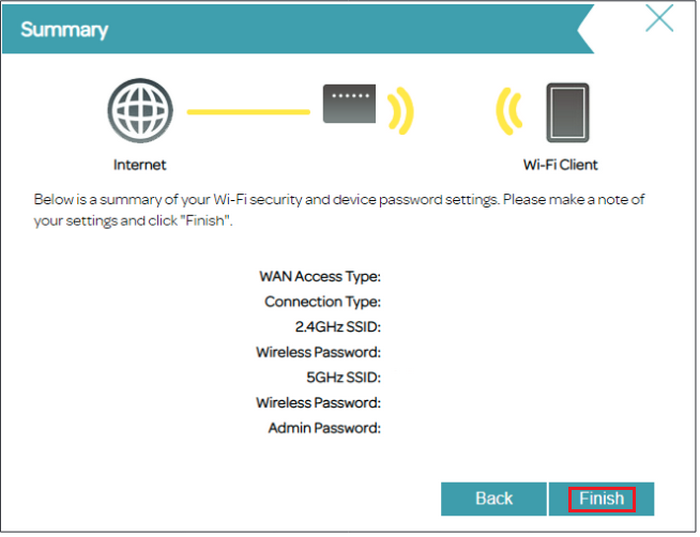
6. You will be presented with a summary of your settings. Click Next to finalize the settings. At the end of the wizard, you will be presented with a final summary of your settings.
7. Click Finish to close the wizard. The device will then reboot.
Wait 3-5 minutes for the modem to go online, then test the service.
If your modem has any existing profiles configured, make sure to delete them to avoid double authentication or connection issues. You can usually find these profiles in your modem’s settings under sections like ‘Internet Settings,’ ‘WAN Setup,’ or ‘PPP Connections
- Old Interface
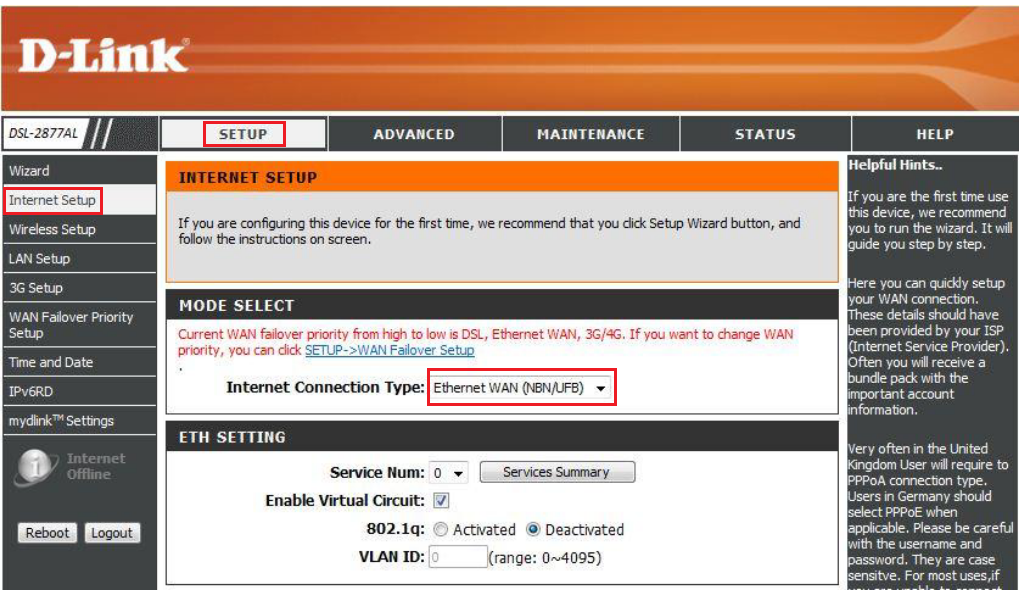
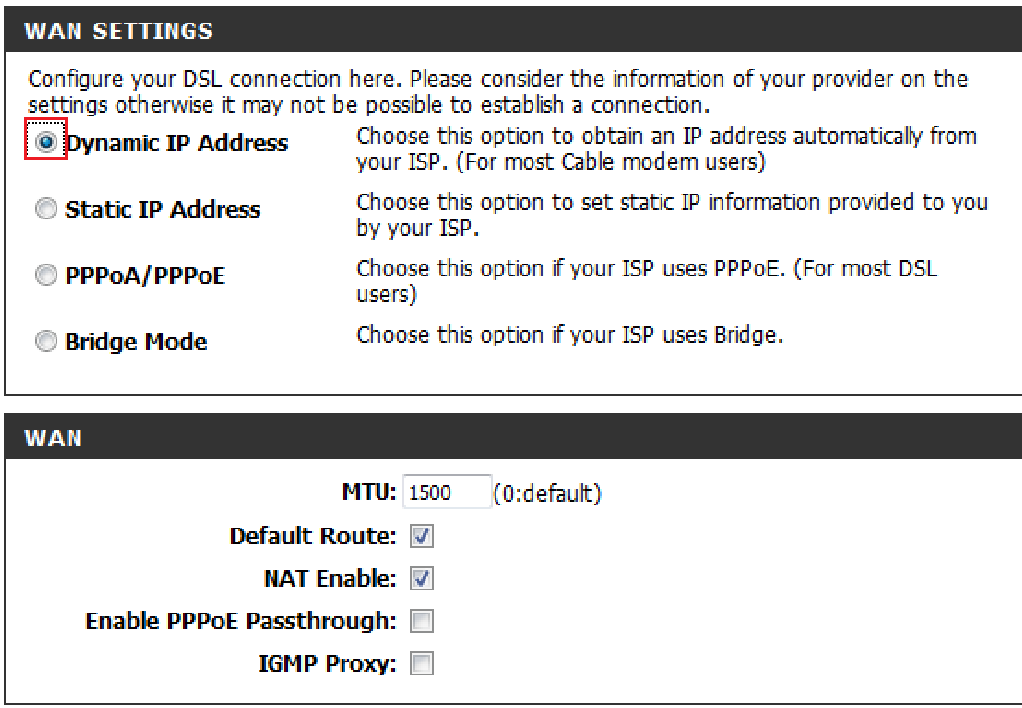
Advanced Settings (if prompted):
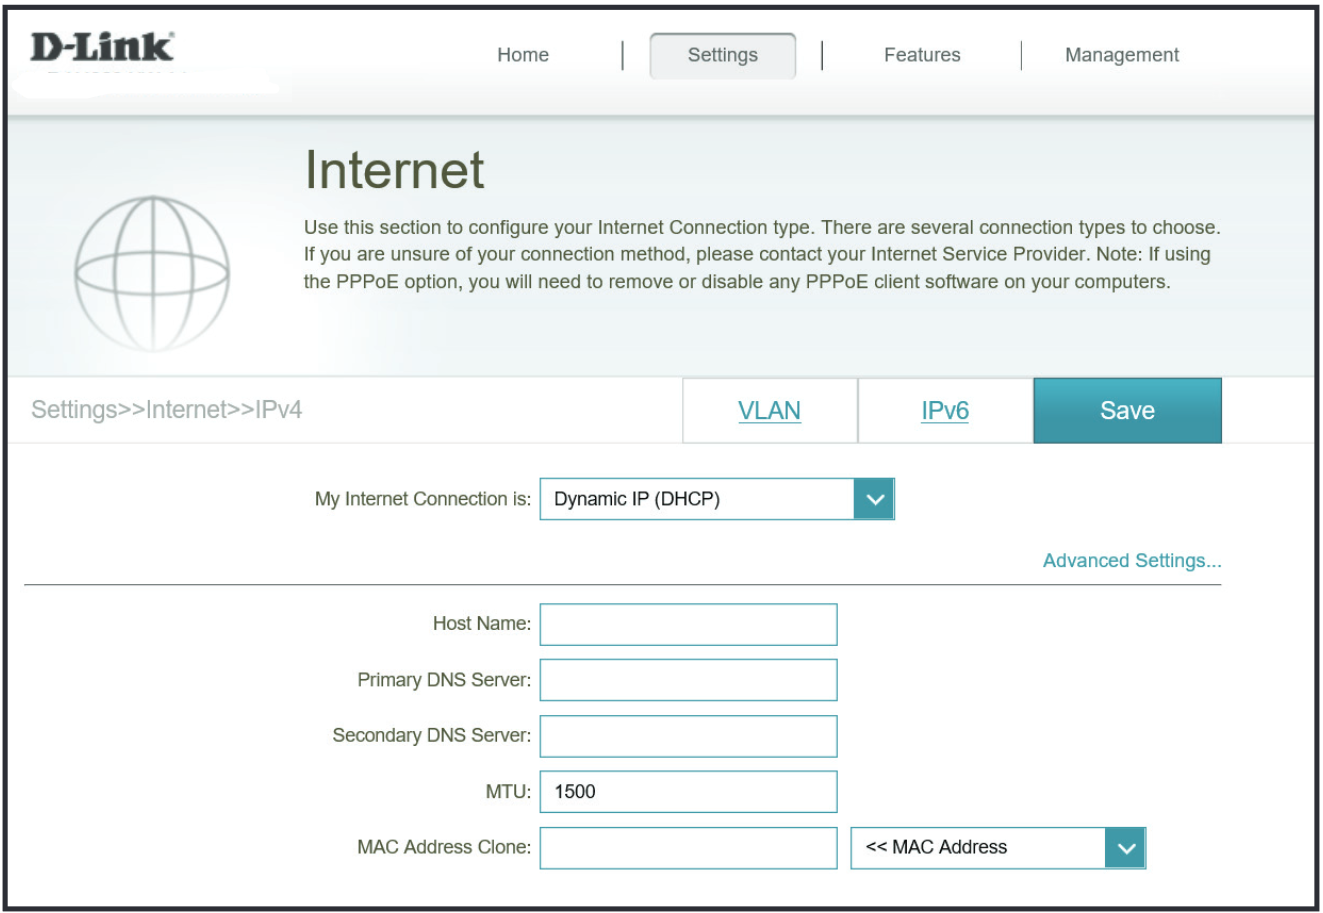
- Host Name - Leave it blank
- Primary DNS Server - Leave it blank
- Secondary DNS Server - Leave it blank
- MTU Maximum Transmission Unit - Accept default value
- MAC Address Clone - The default MAC address is set to the Internet port’s physical interface MAC address on the router. Leave it blank if the system permits. If it doesn’t, copy the MAC address from the sticker on the router.
Setting up your Home Phone
If your order includes a Home Phone service, you’ll need to complete the setup. This quick and easy guide will walk you through the process of setting up your home phone using a BYO modem.
