How to Set up TP-Link HX220 Whole Home Mesh Wi-Fi unit
Estimated Reading Time: 2 MinutesAppearance
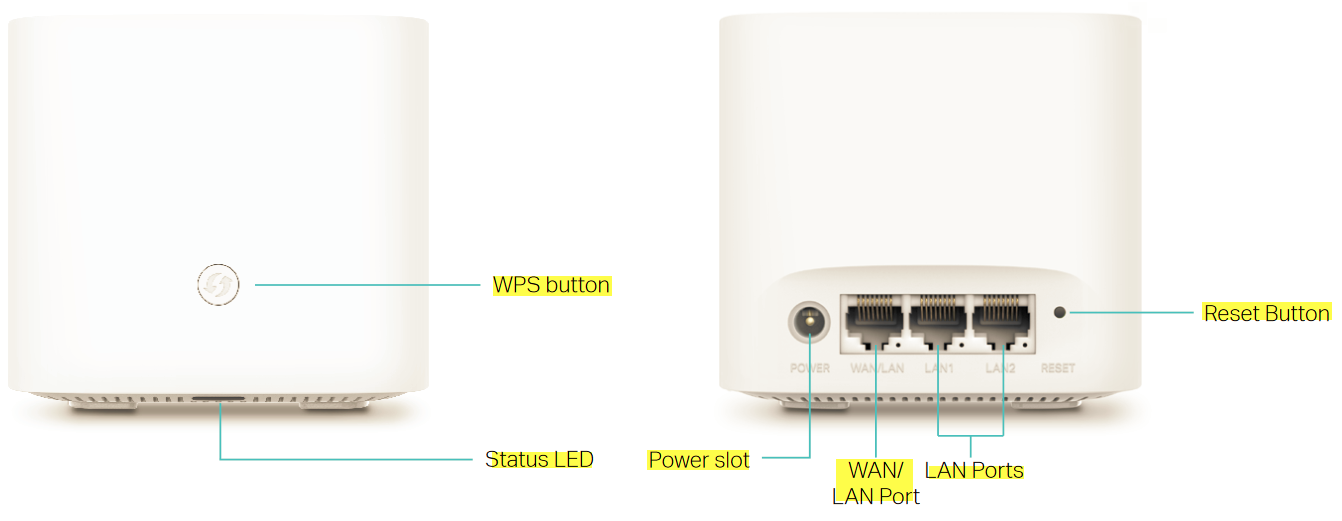
The device has LED that changes its behaviour according to its working status and a WPS button, three RJ-45 Ethernet ports, a power port, and a RESET button.
Understanding the LED Status
|
Status |
Indication |
|
Yellow |
The connection quality of the device is normal. |
|
Flashing yellow |
The device is starting up or resetting. |
|
Flashing blue |
The device is ready for configuration. |
|
Fast flashing blue |
The device is trying to establish a WPS or mesh connection. This process may take up to two minutes. |
|
Blue |
The device has been set up as a controller, or its wireless/wired connection with the controller is good, but the internet is unavailable. |
|
Flashing white |
The device is upgrading the firmware. |
|
White |
The device is ready and the internet is available. |
|
Flashing red |
The device has lost connection with the controller. (For agent only). |
|
Red |
The device has an issue. |
|
Off |
Power is off, or the status LED is turned off. |
How to Set Up HX220 AX1800 Whole Home Mesh Wi-Fi
1. Connect the power adapter to your HX220 and turn it on. Once the LED is flashing blue, the device should be ready for configuration.
2. Access your TP-Link VX230 modem by typing in http://tplinkmodem.net/ or http://192.168.1.1/ on a web browser and log in with the password you set for the modem. Alternatively, you can log in using your TP-link ID.
The default password is admin1.

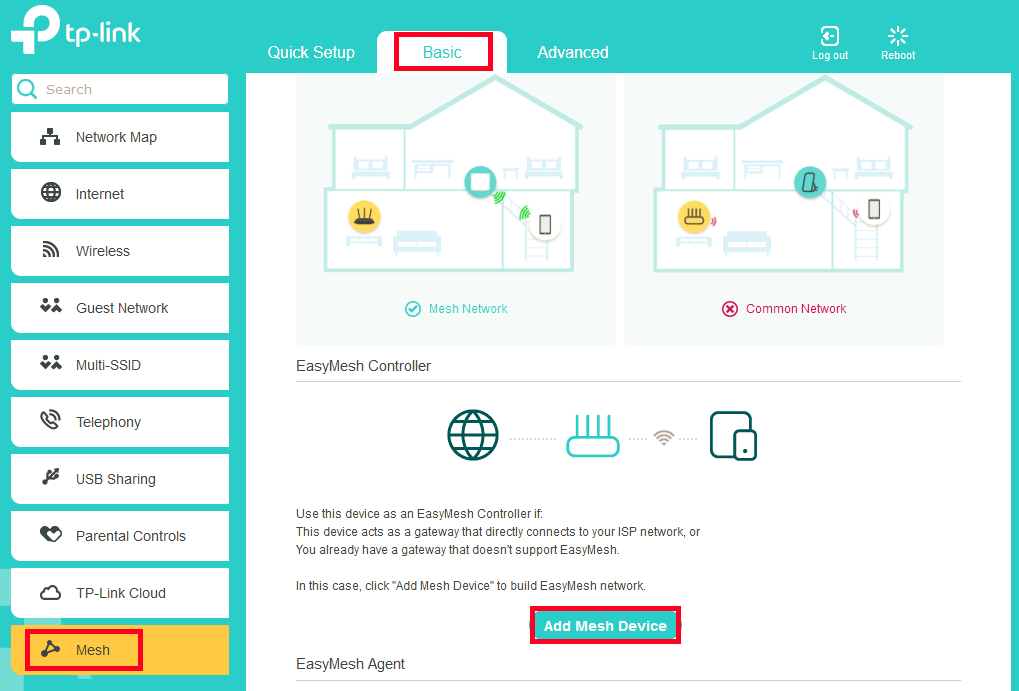
3. Once logged in, go to Basic > Mesh and make sure EasyMesh is enabled.
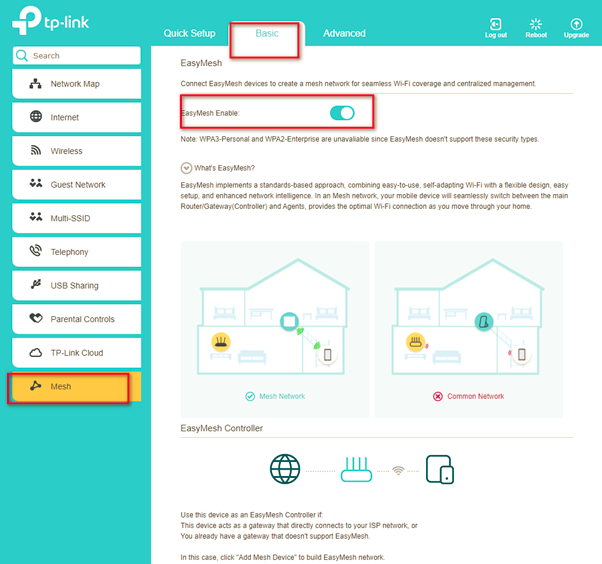
4. Scroll down and click Add Mesh Device
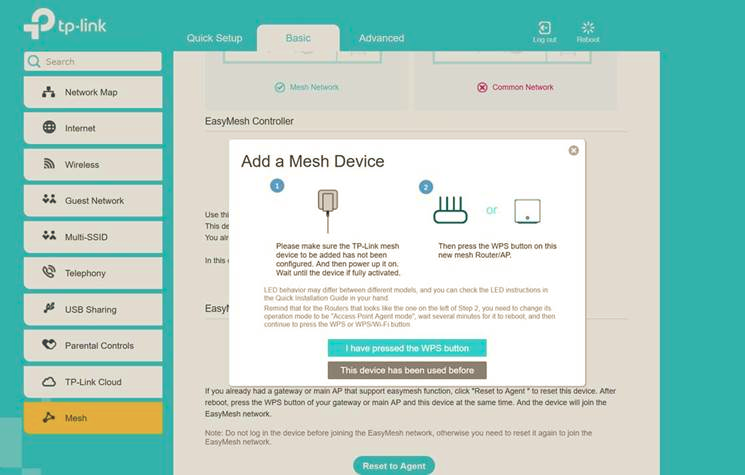
Once you click ‘I have pressed the WPS button’ you need to wait for 3-5 minutes until it automatically detects and adds the Mesh unit.
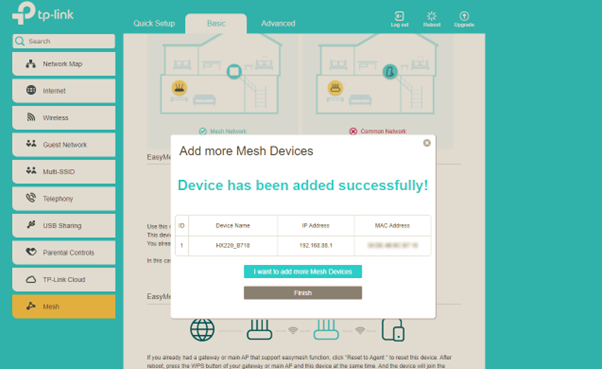
Once the HX220 has been added successfully, click ‘Finish’ to continue.
Once done, it will be listed on the EasyMesh page and you can start using the device.
Otherwise, you need to find it in the Add Mesh Device list and click Add to add it to the EasyMesh network.
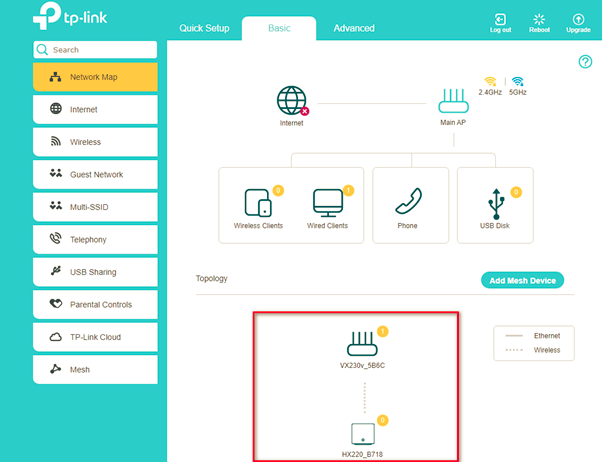
To view the mesh devices and connected clients in the network:
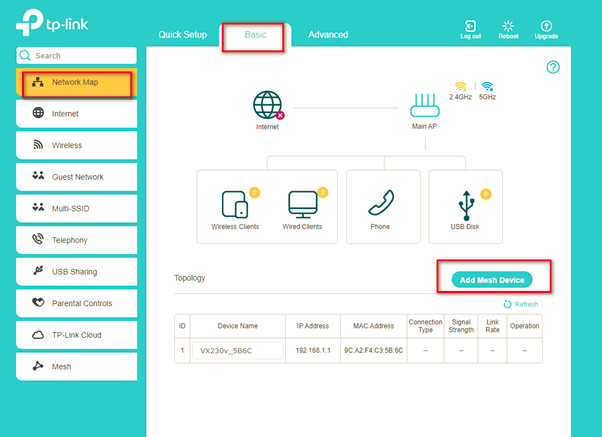
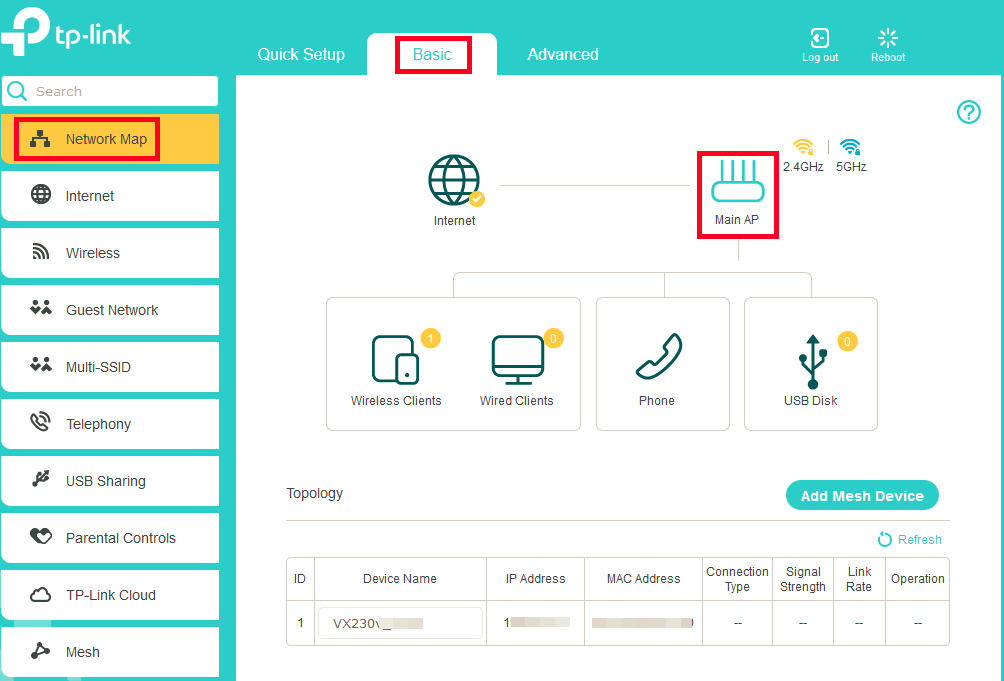
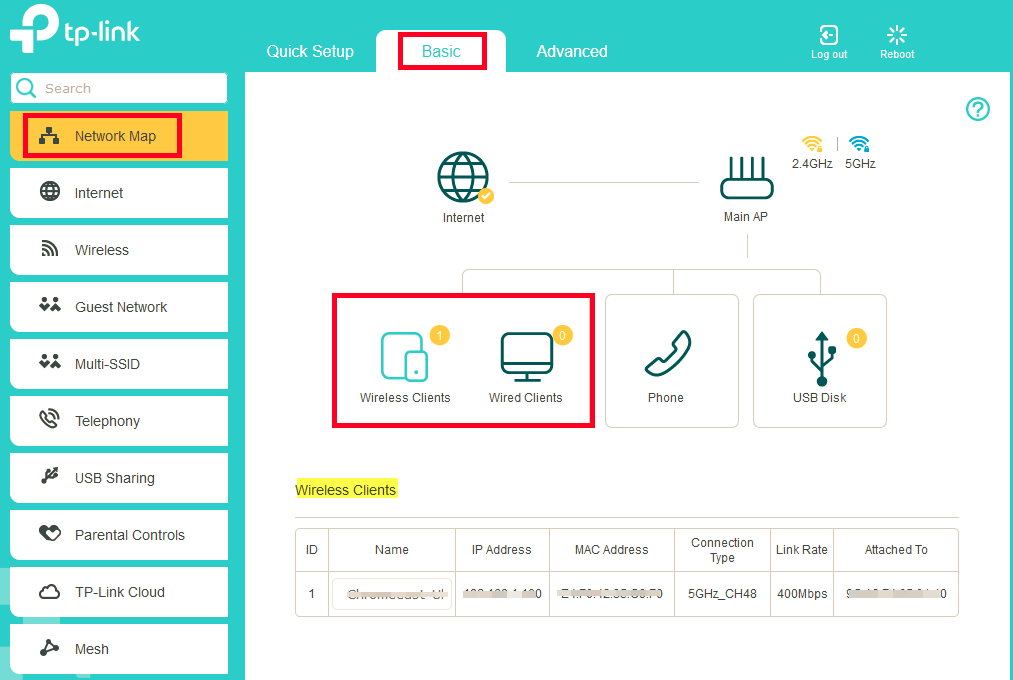
1. Go to Basic > Network Map.
2. Click the "Main AP" icon to view all mesh devices
3. Click the "Wired and Wireless Clients" icon to view all connected clients.
To manage an EasyMesh device in the network:
Click the Mesh device’s IP Address to redirect to the web management page of this device and view detailed information.

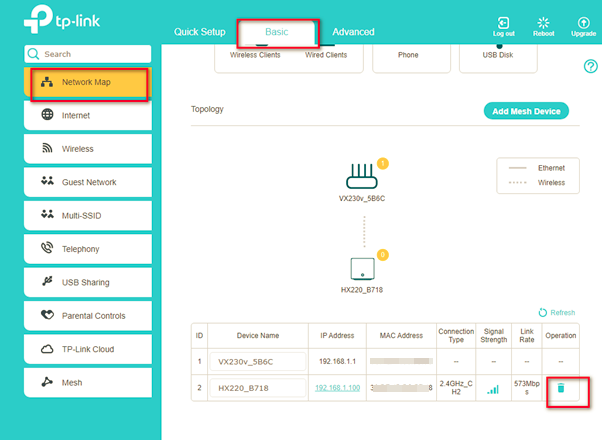
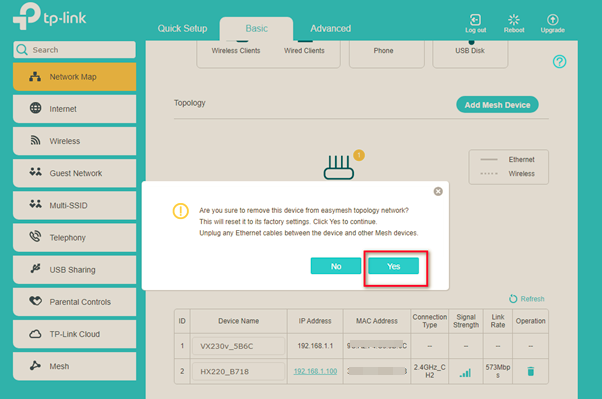
How to Remove the Mesh Device from your TP-Link VX230 Modem
Simply click on the trash icon to remove the device.