How to Configure the APN Settings for Netgear AC810 to connect SpinTel 4G Home Internet
Estimated Reading Time: 1 MinutesFor the SpinTel Internet connection, you must manually configure the Access Point Name (APN) settings on your NETGEAR AC810. Follow these instructions to manually configure APN settings.
- Press and release the Power button to restart your AC810.
- Connect to the modem’s Wi-Fi network
- Make sure your device (Mobile/Laptop/Computer) is connected to the modem’s Wi-Fi network. The Wi-Fi name and password are displayed on the LCD screen as shown below.
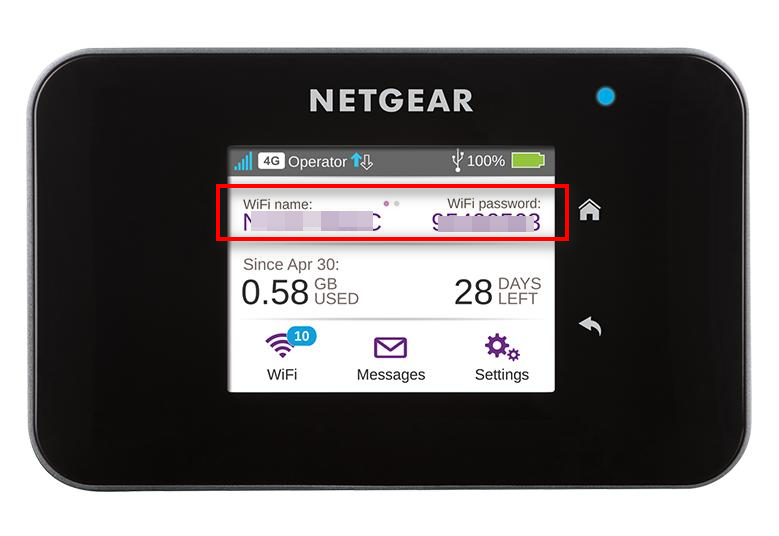
- Make sure your device (Mobile/Laptop/Computer) is connected to the modem’s Wi-Fi network. The Wi-Fi name and password are displayed on the LCD screen as shown below.
-
Sign In to the Dashboard
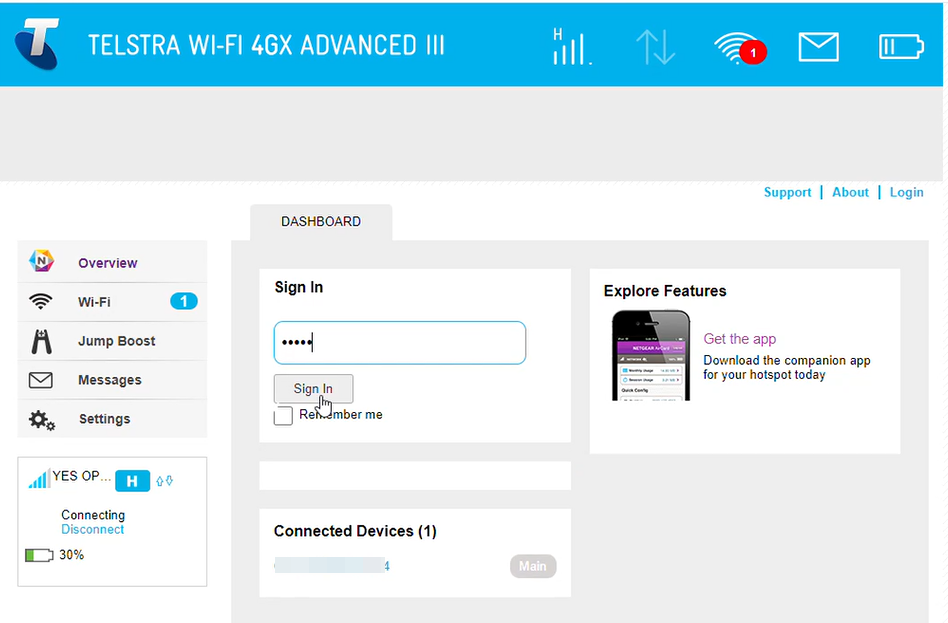
- Open a web browser on your device and enter http://m.home in the address bar or Click here to access the dashboard.
- Sign in using the password: admin.
-
Access Settings
- Once logged in, locate the menu on the left side of the dashboard and click on Settings.
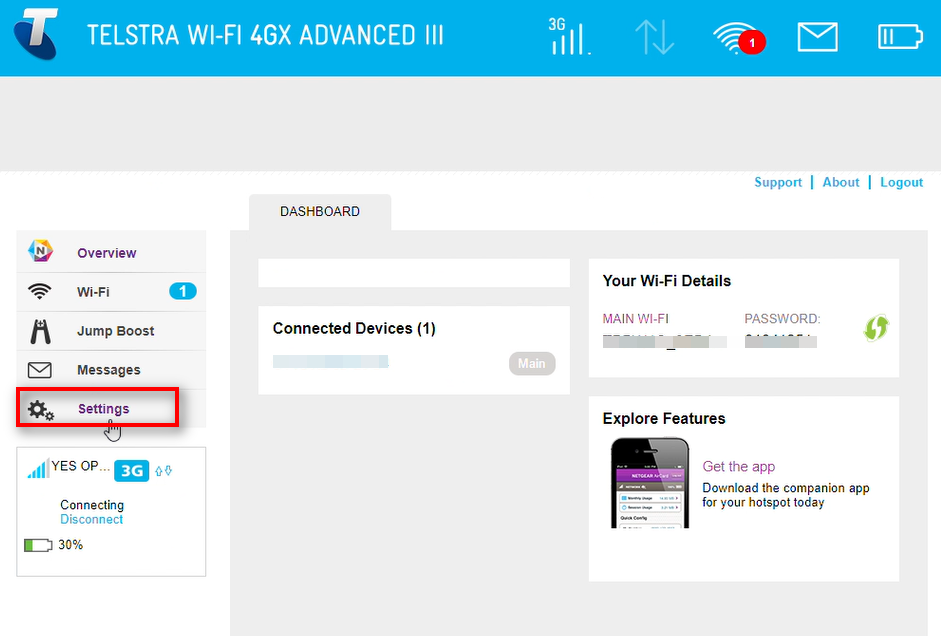
- Once logged in, locate the menu on the left side of the dashboard and click on Settings.
-
Navigate to the Network Tab
- Within the Settings menu, find and select the Network tab.
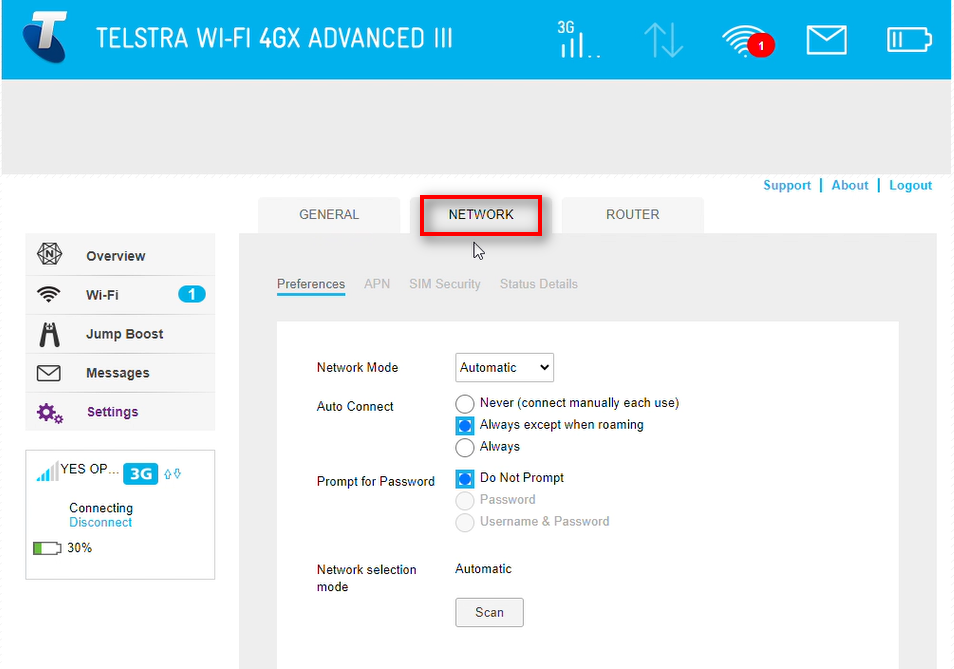
- Within the Settings menu, find and select the Network tab.
-
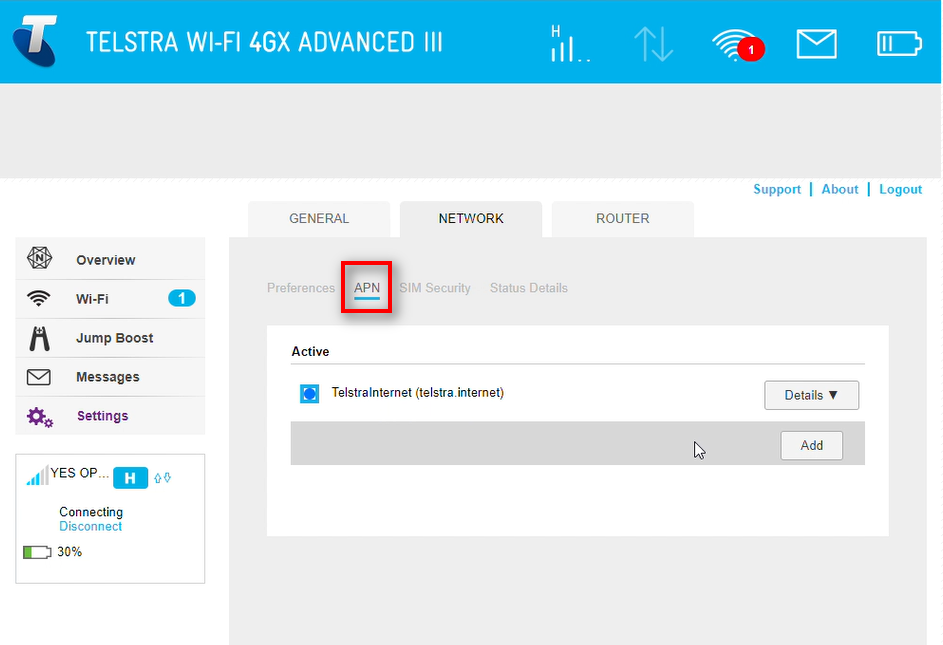
Select APN
- In the Network tab, locate the APN section.
- Click on APN to manage Access Point Names.
-
Add a New APN Profile
- Click the Add button to create a new APN profile.
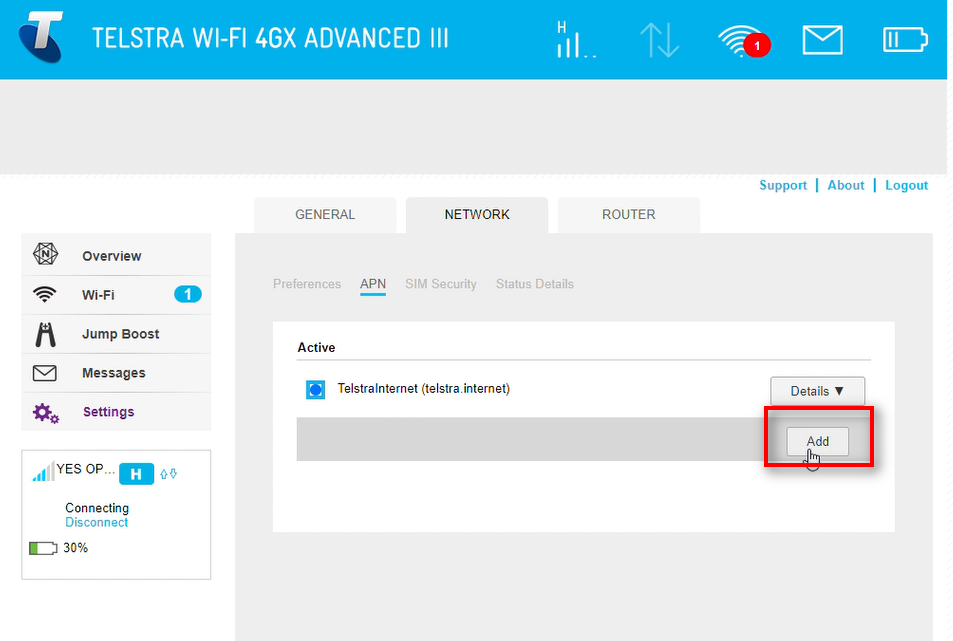
- Click the Add button to create a new APN profile.
-
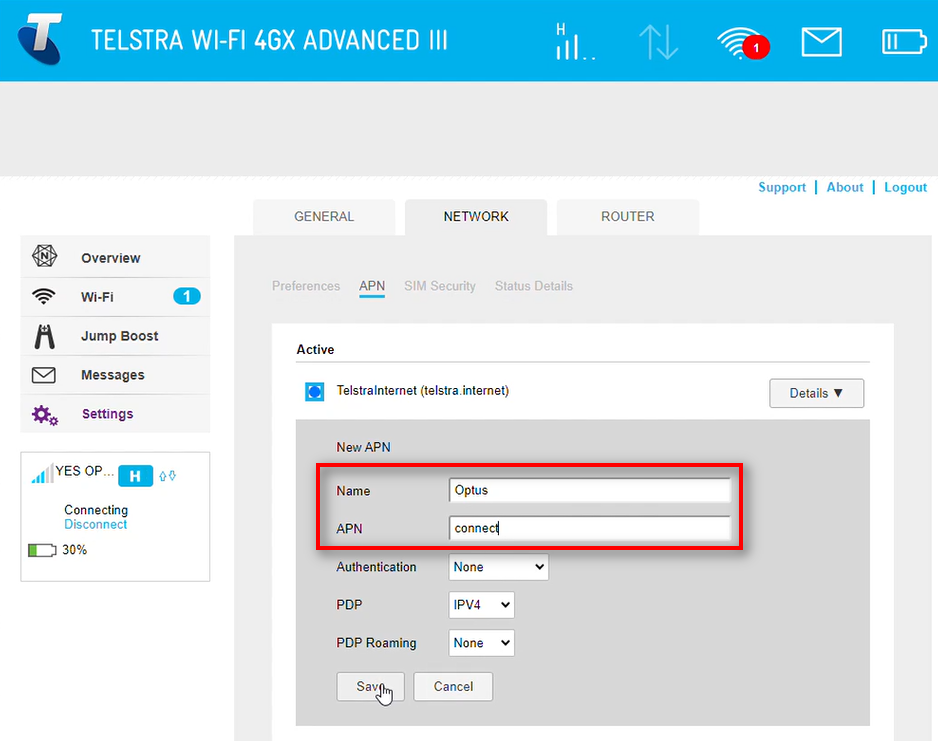
Input APN Details
- In the Name field, enter Optus.
- In the APN field, enter connect.
-
Save the New Profile
- After entering the required details, click Save to store the new APN profile.
- After entering the required details, click Save to store the new APN profile.
-
Activate the New Profile
-
Select the new profile you just created to activate it.
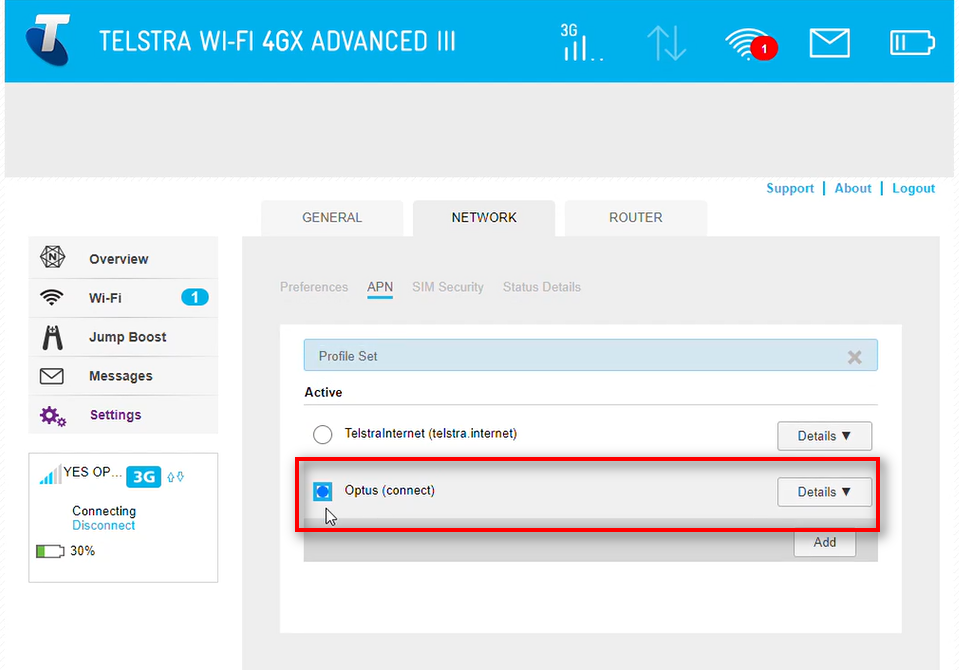
-
All set! Your device should be connected to the internet in the next 60 seconds. Check the Overview or status page on your Netgear AC810 to confirm it shows "connected."
