There are 2 different types of ports you need to check whether your modem is compatible with the type of nbn service that you have on your premise.
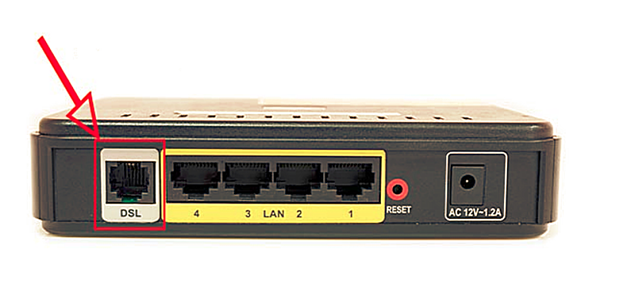
1. DSL port - often grey in colour, uses RJ11 cable. This is the same as the old telephone cable you would use to plug your home phone into the wall socket.
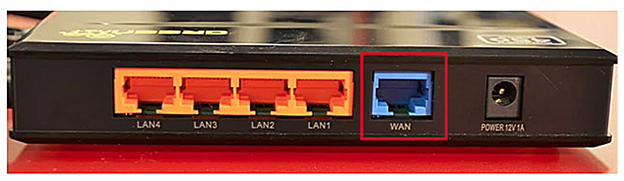
2. WAN port - Also known as the internet port that uses RJ-45 Ethernet cable to connect your TP-Link modem to the nbn connection device.
Some modems have both of these ports, and some only have one. To identify which port is required for your nbn type of service, check the table below.
|
NBN type |
Modem connection type |
Authentication |
Port Required |
|
Fibre to the Premise |
Router/WAN connection |
IPOE/Dynamic/DHCP/Automatic IP |
WAN |
|
Fixed Wireless |
Router/WAN connection |
IPOE/Dynamic/DHCP/Automatic IP |
WAN |
|
Hybrid Fibre Coaxial |
Router/WAN connection |
IPOE/Dynamic/DHCP/Automatic IP |
WAN |
|
Fibre to the Curb |
Router/WAN connection |
IPOE/Dynamic/DHCP/Automatic IP |
WAN |
|
Fibre to the Node |
VDSL Modem required |
IPOE/Dynamic/DHCP/Automatic IP |
DSL |
|
Fibre to the Basement |
VDSL Modem required |
IPOE/Dynamic/DHCP/Automatic IP |
DSL |
To access the modem interface, please make sure your device is connected to your Tenda modem through a wired or wireless connection.
1. From your browser, type in http://tplinkmodem.net or http://192.168.1.1 in the address bar and hit Enter.
If the IP address does not work, please check the label attached to the back of the modem/router. Else, check your router’s IP address. For instructions, click here.
2. When prompted, enter admin1 in the password field for the TP-Link VX230 modem. For other TP-Link modem models supplied by SpinTel, enter admin as the password.
If you have already customised the password, enter your personalised credentials, then click Login to continue.

For Newer TP Link Version
Once logged in, you will be routed to the Home page. Go to the Advanced tab and check the Operation Mode:
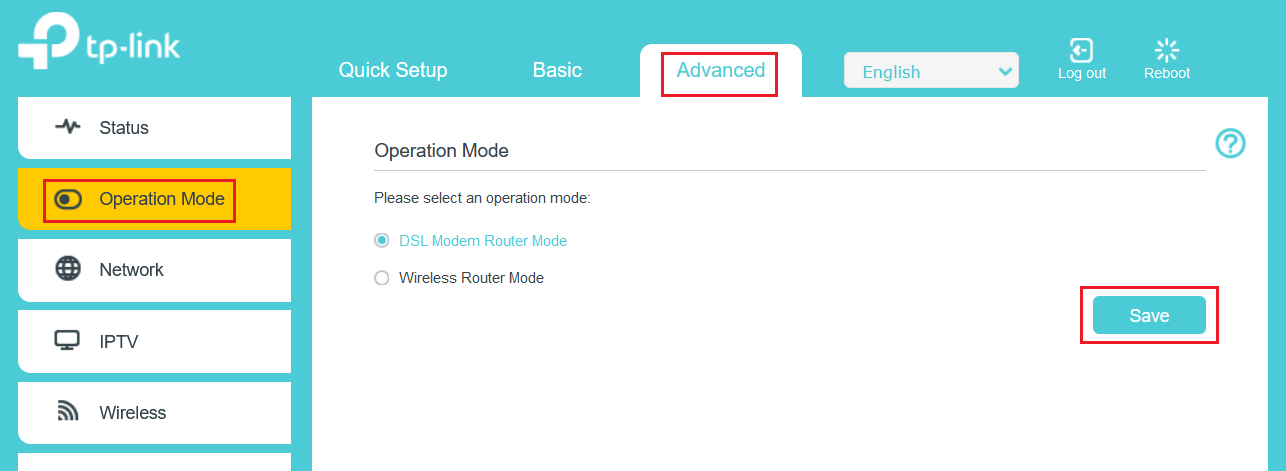
The modem will automatically reboot if you change/update the Operation mode.
Once done, you can configure the modem through Basic or on the Advanced tab.
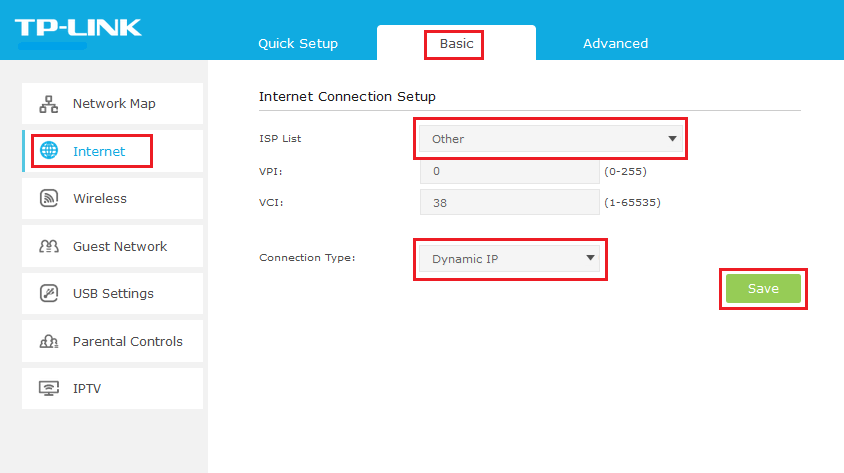
Here’s a guide through the Basic tab:
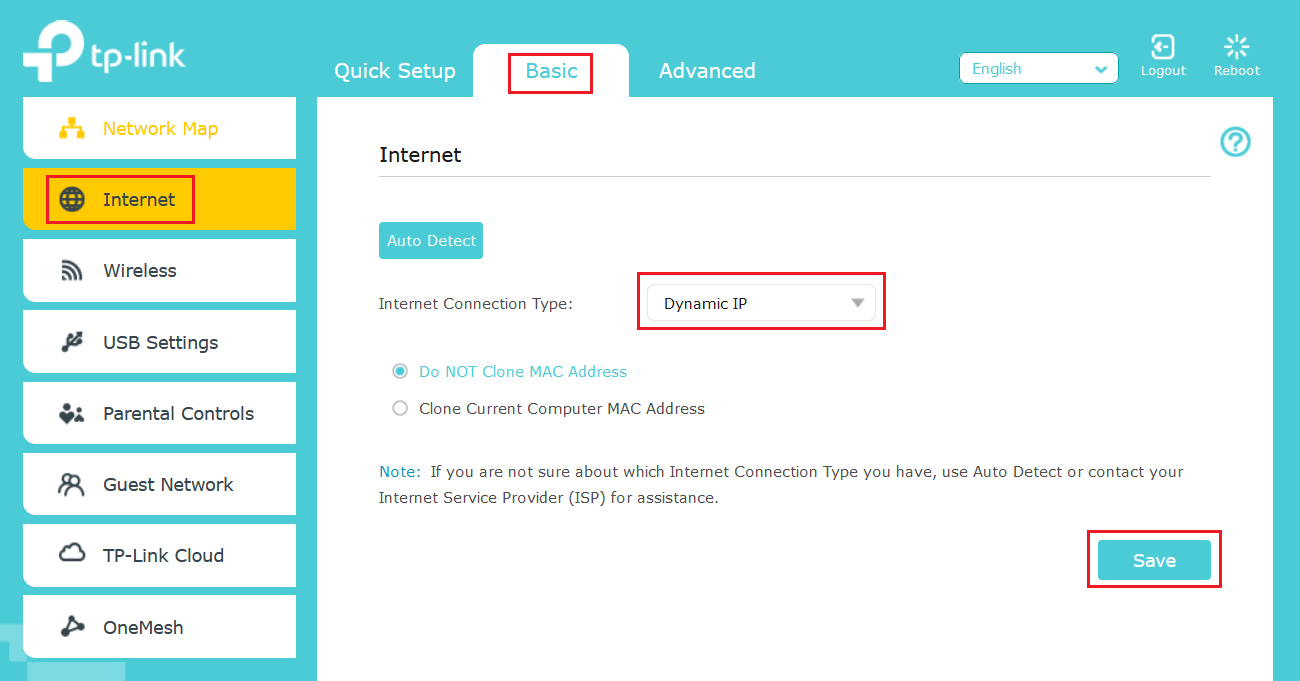
Wait 3-5 minutes for the modem to go online, then test the service. Reboot modem if needed.
If your modem has any existing profiles configured, make sure to remove them to avoid double authentication or connection issues.
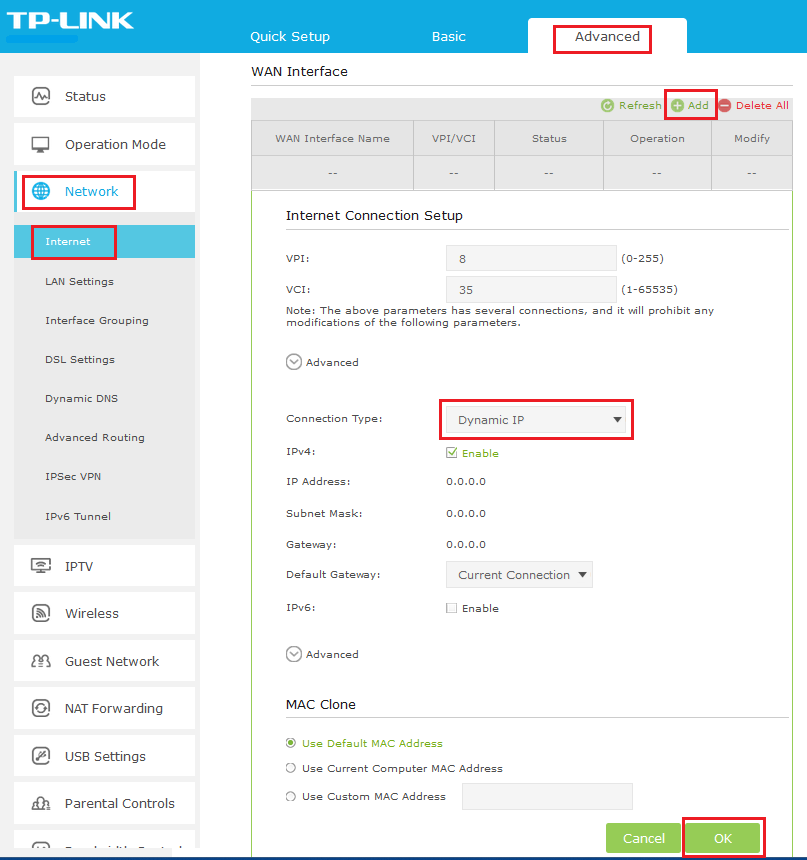
Alternatively, you can configure the modem through the Advanced tab:


Wait 3-5 minutes for the modem to go online, then test the service. Reboot modem if needed.
Through the Advanced tab:
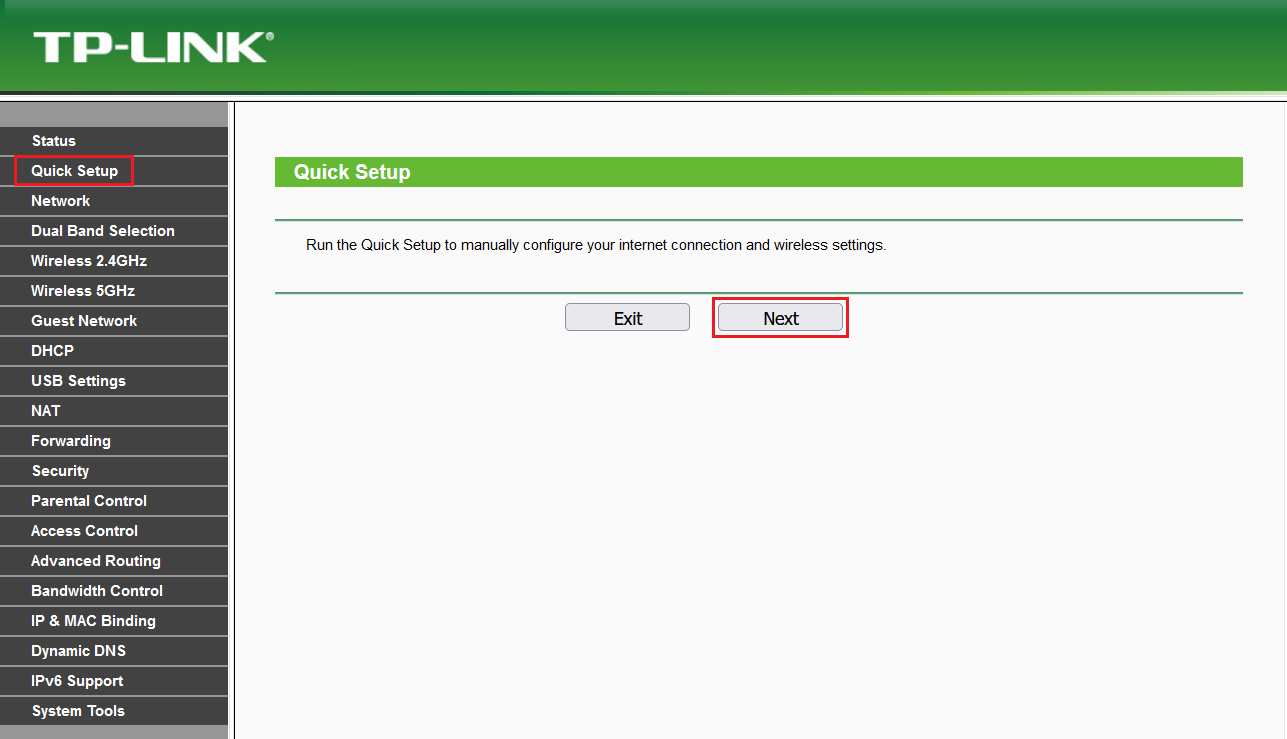
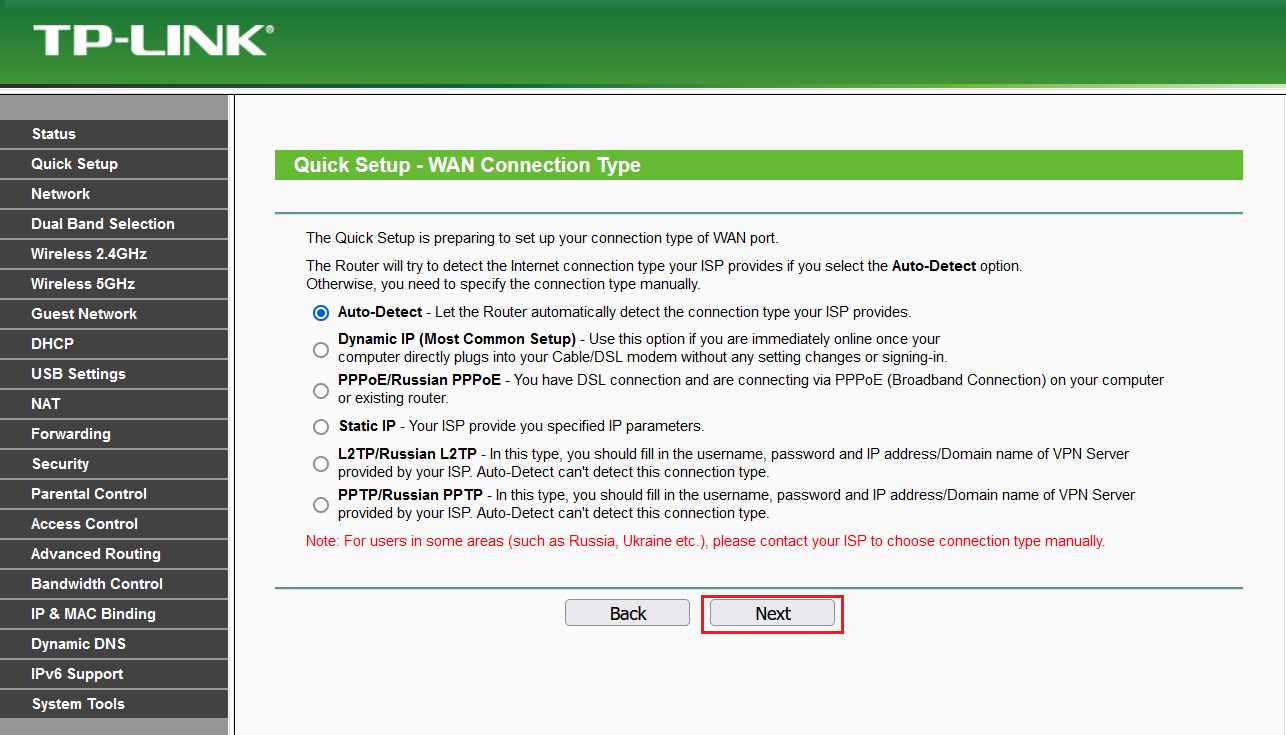
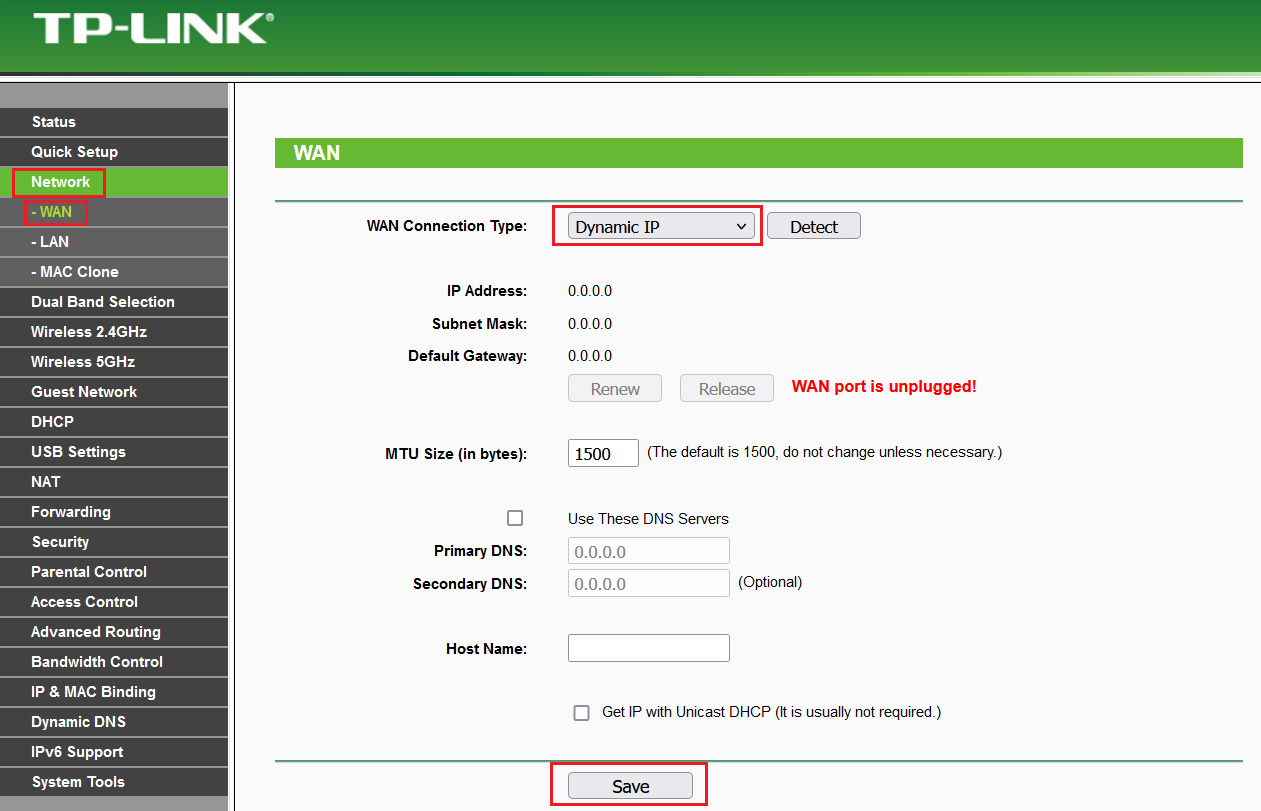
For older version:
You may run Quick Setup > Next > choose Auto Detect or Dynamic IP then Save.
Through Manual Setup:
Wait 3-5 minutes for the modem to go online, then test the service. Reboot the modem as needed.
⚠️If your modem has any existing profiles configured, make sure to delete them to avoid double authentication or connection issues. You can usually find these profiles in your modem’s settings under sections like ‘Internet Settings,’ ‘WAN Setup,’ or ‘PPP Connections.
If your order includes a Home Phone service, it’s time to get it up and running. This detailed guide will walk you through every step needed to set up your home phone using your own modem.
Article ID: 829
Created: May 20, 2024
Last Updated: October 8, 2025
Author: Annive Federicos [annive.federicos@spintel.net.au]
Online URL: https://articles.spintel.net.au/article/setting-up-tp-link-byo-modem-for-spintel-nbn.html